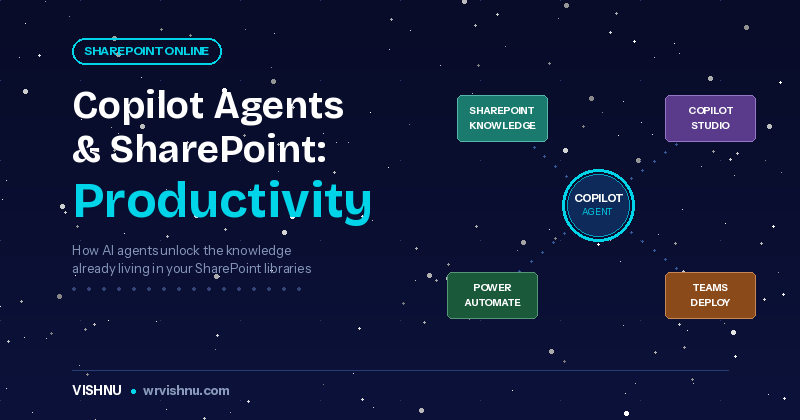
Why an HR Onboarding Agent?
Every organisation has the same onboarding problem. New hires arrive on day one with dozens of questions — How do I submit a leave request? What is the dress code? Where do I find the IT setup guide? — and they either spend hours searching through SharePoint or bombard HR with the same queries week after week.
A Copilot agent grounded in your HR document library changes this entirely. Every new employee gets instant, accurate, policy-based answers — without waiting for HR to respond. HR gets fewer repetitive tickets. New hires ramp up faster. Everyone wins.
In this guide, we will build an agent called “AskHR” — a conversational assistant grounded in an HR Onboarding document library in SharePoint Online. By the end, you will have a working agent accessible from SharePoint and Microsoft Teams.
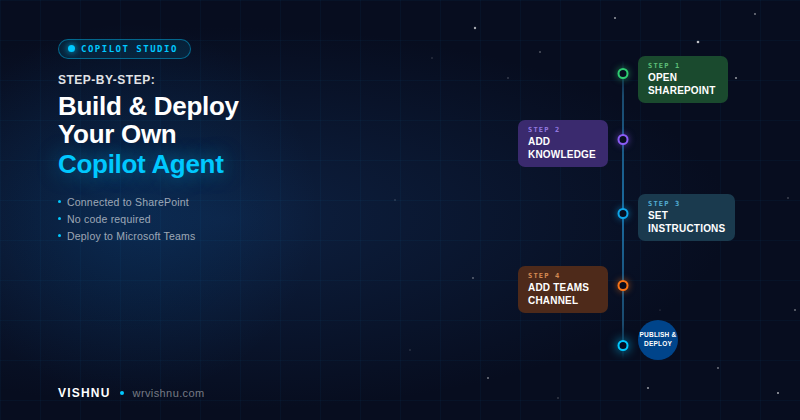
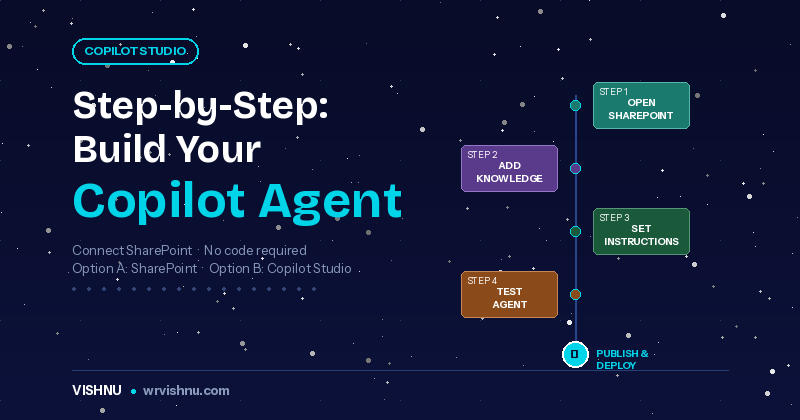
Approach: This guide uses Option creating an agent directly from a SharePoint document library. No Copilot Studio required. You need only Edit permissions and a Microsoft 365 Copilot licence (or pay-as-you-go billing).
Before You Begin
- Microsoft 365 Copilot licence — or pay-as-you-go billing enabled for your tenant
- Edit permissions (Site Member or Site Owner) on the target SharePoint site
- A SharePoint document library with HR onboarding documents (Word, PDF, PowerPoint supported)
- Documents should be well-named and current
Follow along with sample documents
Download sample HR onboarding documents to build the AskHR agent alongside this guide: Employee Onboarding Policy, New Hire Onboarding SOP, New Employee User Guide, and IT Setup Guide.
Prepare Your HR Onboarding Document Library
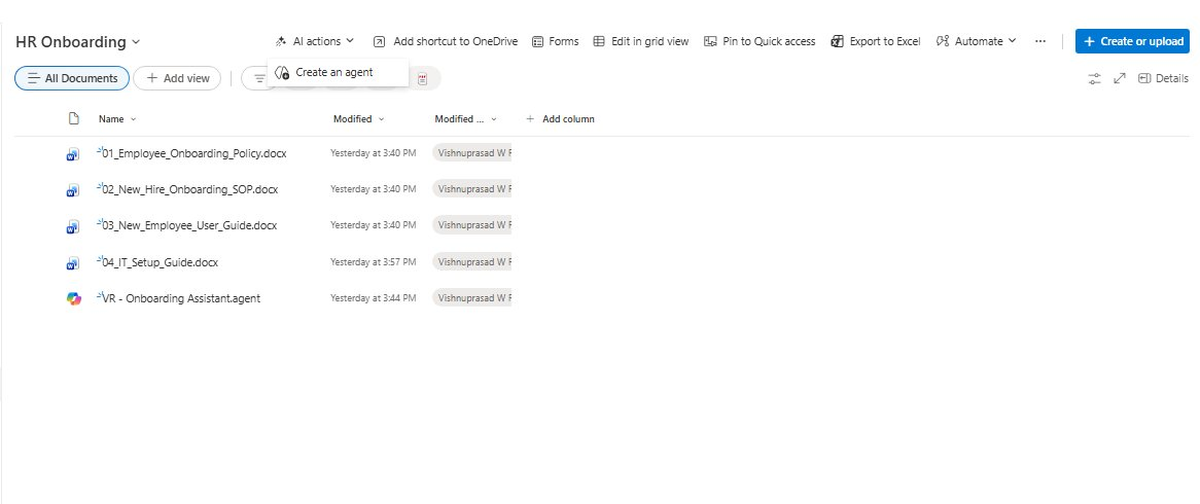
Navigate to your SharePoint site and open the document library containing your HR policies. For this walkthrough, I created a library called HR Onboarding with four documents.
Tip: Name files descriptively — “Employee_Onboarding_Policy.docx” performs far better than “Policy_v3_final.docx”. Remove outdated versions before connecting the agent.
Create the Agent from the Document Library
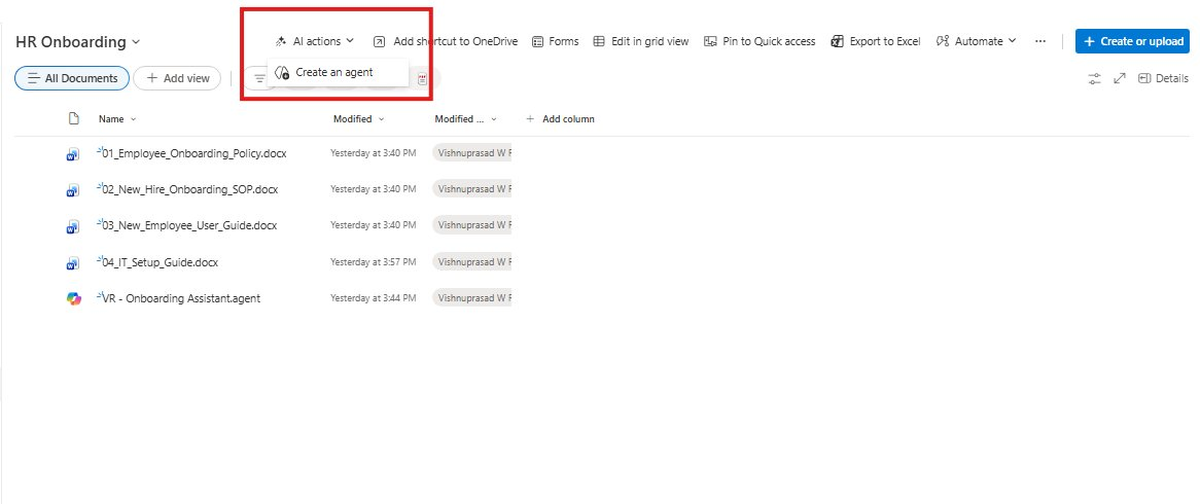
- Click AI actions in the command bar.
- Select Create an agent from the dropdown.
- The agent is grounded in the entire library. Select Edit to configure it.
Alternative: Select specific files first, then right-click and choose Create an agent to scope it to only those documents.
Configure the Agent — Overview Tab
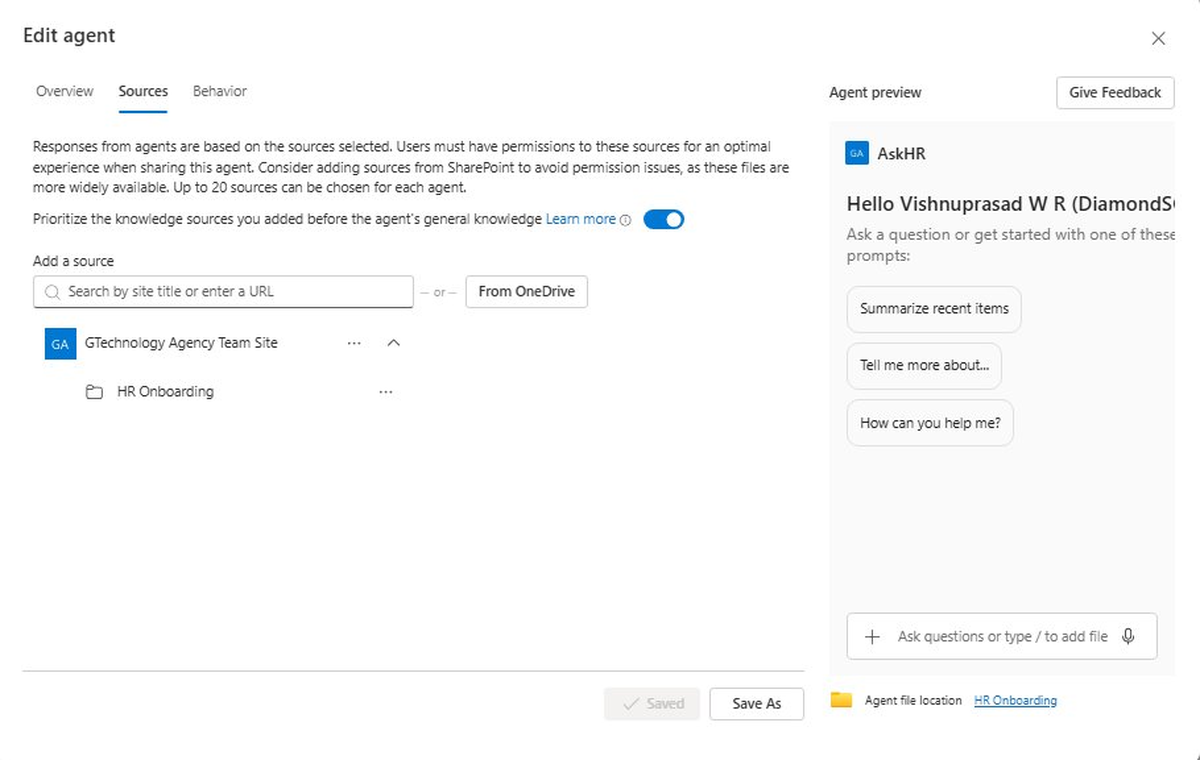
The Edit dialog has three tabs: Overview, Sources, and Behavior. On the Overview tab, set the agent’s identity:
- Name: AskHR
- Purpose: “Your guide to everything you need to know during your first 90 days”
- Icon: Optionally change to make it recognisable

Review Knowledge Sources — Sources Tab
The Sources tab shows the HR Onboarding library is already pre-selected. The toggle to prioritize knowledge sources over general knowledge is enabled by default. You can add up to 20 sources — additional sites, libraries, folders, or files.
Security: The agent respects SharePoint permissions. Users only see answers from content they already have access to.
Configure Agent Behavior — Behavior Tab
The Behavior tab has the biggest impact on response quality. Configure three fields:
Welcome Message
Welcome to AskHR! I can help you with onboarding questions, company policies, leave entitlements, IT setup, and more.
Starter Prompts
- “Summarize Key Policy”
- “Tell me more about HR Policy…”
- “Tell me more about HR SOP…”
Agent Instructions
You are AskHR, an onboarding assistant for new employees. Help new hires find accurate information about company policies, onboarding procedures, IT setup, and workplace guidelines. Rules: – Always base answers on the connected SharePoint documents. – If the answer is not in the documents, say so and direct users to HR. – Keep answers concise, friendly, and professional. – Reference the document name when citing a policy. – Do not assume information outside the connected documents.
Tip: Explicit fallback rules prevent hallucination and build trust. The more specific your instructions, the better the agent performs.
Download sample agent configuration from the download section.
Save and Test the Agent in SharePoint
Click Save. The agent is now live. Click the Copilot icon in the SharePoint suite bar to open the agent panel — you will see the AskHR welcome message and custom starter prompts.
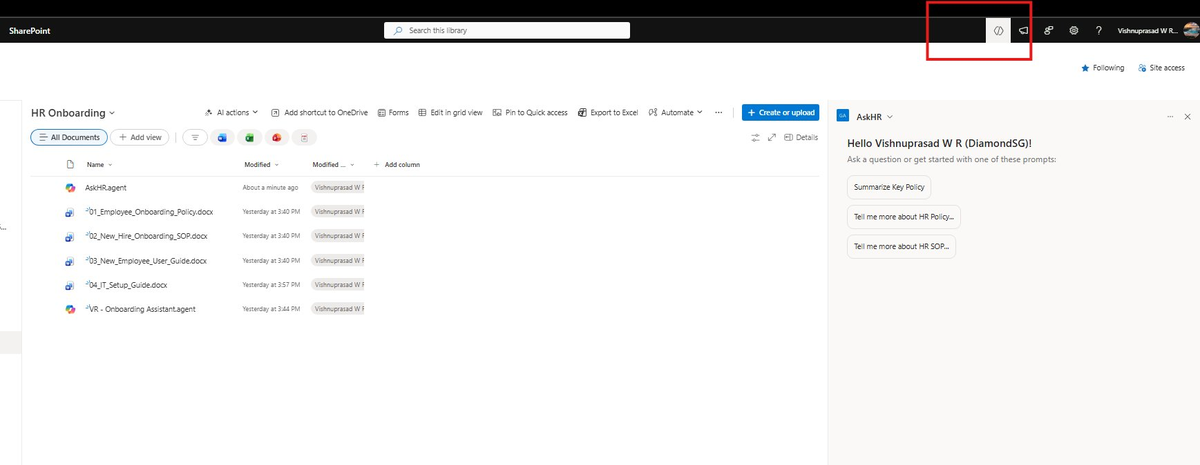
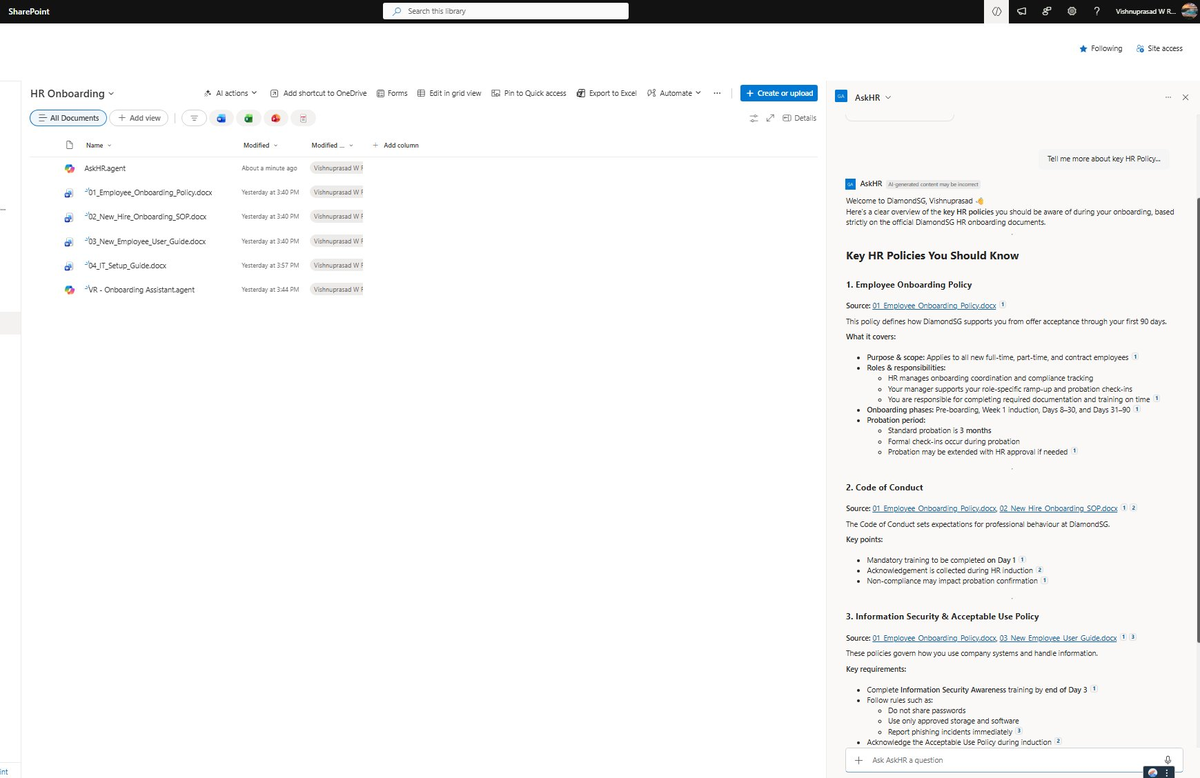
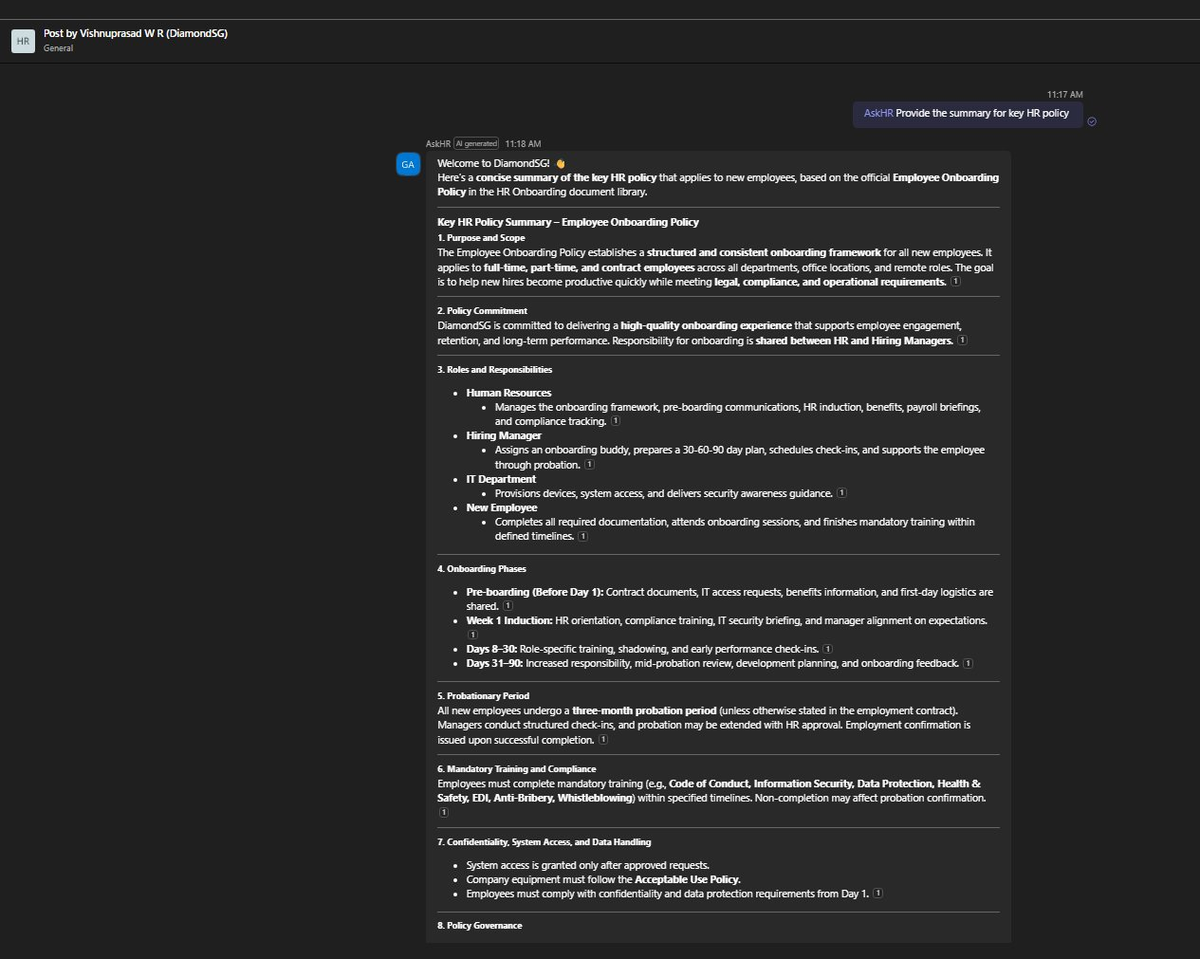
Click a starter prompt or type your own question. The agent responds with grounded, cited answers drawn from your HR documents.
Share, Approve, and Manage the Agent
Click the ellipsis (…) next to AskHR in the agent panel to access management options.


Deploying AskHR to Microsoft Teams
One of the most powerful features is the ability to share agents directly into Teams. Employees can @mention AskHR in a channel without leaving their collaboration workspace.
From the agent menu, click Copy link for Teams, navigate to your Teams channel, paste the link, and post it.
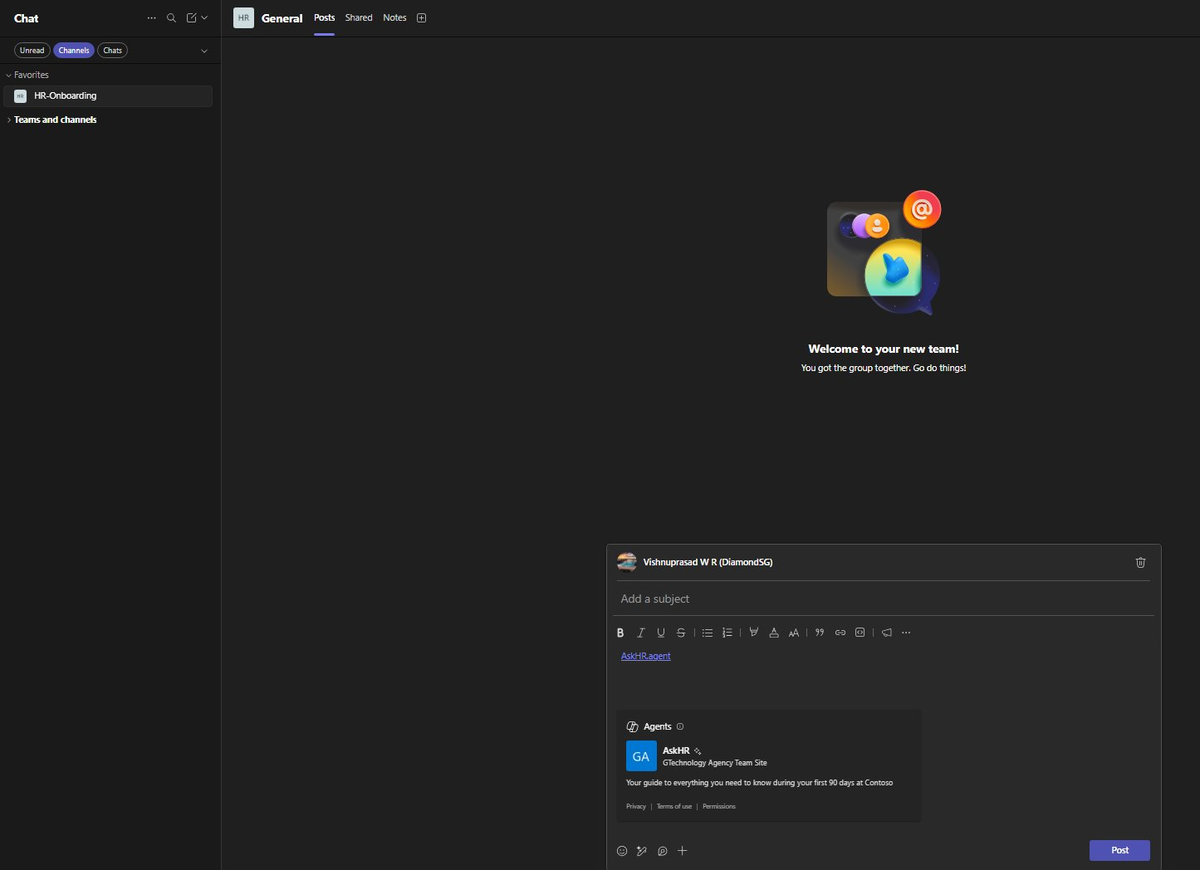
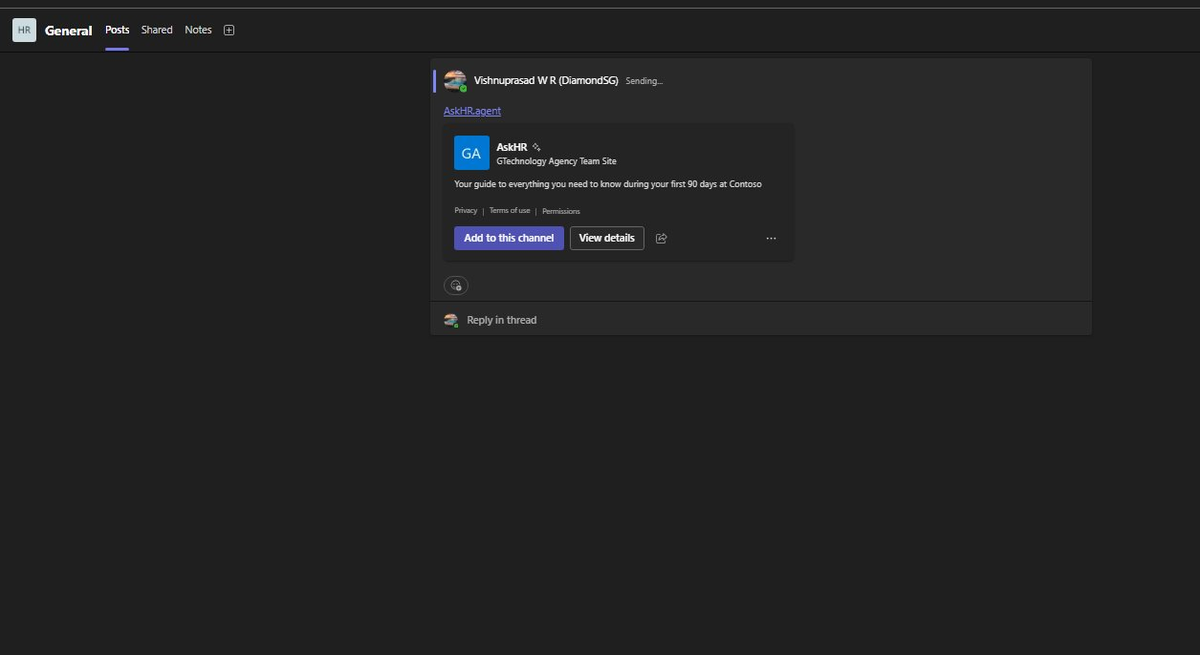
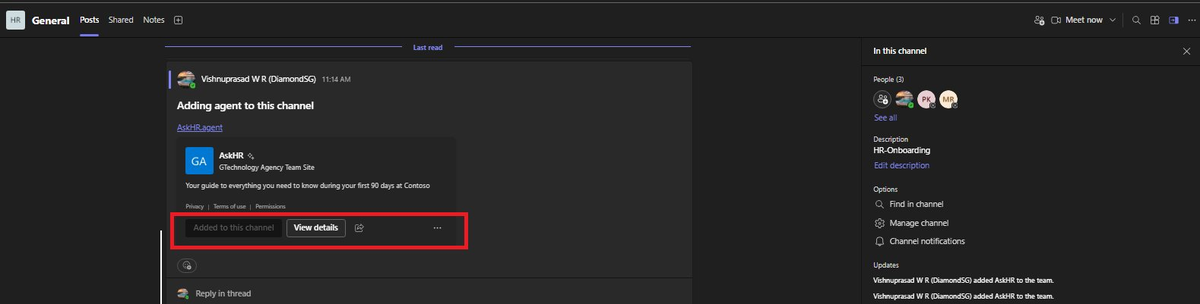
Team members can now @mention AskHR in the channel. The agent responds with the same grounded, cited answers — directly in the Teams conversation.
Keeping AskHR Accurate Over Time
- Keep documents current. Update source documents in SharePoint when policies change. The agent picks up changes automatically.
- Remove outdated content. Old versions in the library will confuse the agent.
- Refine instructions. Monitor what employees ask and tweak the Behavior tab accordingly.
- Version history is your safety net. The
.agentfile supports SharePoint versioning — restore a previous version if needed. - Permissions are always enforced. Changes to document permissions are reflected automatically.
Quick Troubleshooting
What You Have Built
In under 10 minutes and without a single line of code, you now have a working AI agent that:
- Answers employee questions with cited sources from your HR documents
- Respects SharePoint permissions — no risk of exposing restricted content
- Automatically stays current when source documents change
- Works across SharePoint, Microsoft 365 Copilot Chat, and Microsoft Teams
- Supports version history and can be restored if needed
Coming Next
This guide covered the fastest path. But what if you need custom conversation flows, multiple knowledge sources, Power Automate integration, or deployment beyond SharePoint and Teams? That is where Microsoft Copilot Studio comes in.
Upcoming
Building an Agent in Copilot Studio with SharePoint Knowledge
A step-by-step guide with custom topics, multiple knowledge sources, Power Automate integration, and multi-channel deployment. Follow the blog to get notified.
Follow wrvishnu.com for the next post in this series and more practical guides on SharePoint, Microsoft 365 Copilot, and the Power Platform — written from a Solutions Architect perspective.