Copilot Studio agent SharePoint integration is one of the most impactful Microsoft 365 productivity wins available today — turning your existing document libraries into an AI-powered knowledge base that your team can query directly from Microsoft Teams. This guide walks you through every click.
In the previous guide, we built an agent directly from a SharePoint document library — fast, no-code, and effective for straightforward use cases.
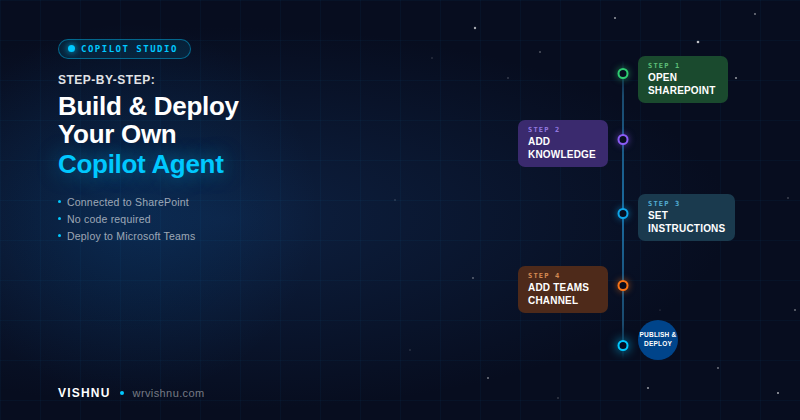
This guide takes the next step: building the same Copilot Studio agent SharePoint integration in Microsoft Copilot Studio — giving you full control over the agent’s configuration, knowledge sources, and deployment — and then adding it to a Microsoft Teams channel so your team can query it without leaving their collaboration workspace.
📋 Table of Contents
Why Use Copilot Studio for SharePoint?
Creating a Copilot Studio agent SharePoint connection from a document library is the fastest path for simple scenarios. The full Copilot Studio experience is the right choice when you need:
- Fine-grained control over agent instructions, tone, and behavior
- Multiple knowledge sources (not just one library)
- Custom conversation topics and Power Automate integration
- Multi-channel deployment — Teams, M365 Chat, web, and more
- Enterprise governance with versioning and approval workflows
For the official documentation, see the Microsoft Copilot Studio documentation and the SharePoint knowledge source guide.
Before You Begin
- Microsoft Copilot Studio licence — or access via Microsoft 365 Copilot
- A SharePoint document library with content you want the agent to reference
- Microsoft Teams — desktop or web client
- Permissions to publish agents in your tenant
Copilot Studio Agent SharePoint: Step-by-Step Build
Open your browser and go to https://copilotstudio.microsoft.com/. From the home screen, click Agents in the left navigation.
Click + New agent and then select Create blank agent to start from scratch rather than using a template.
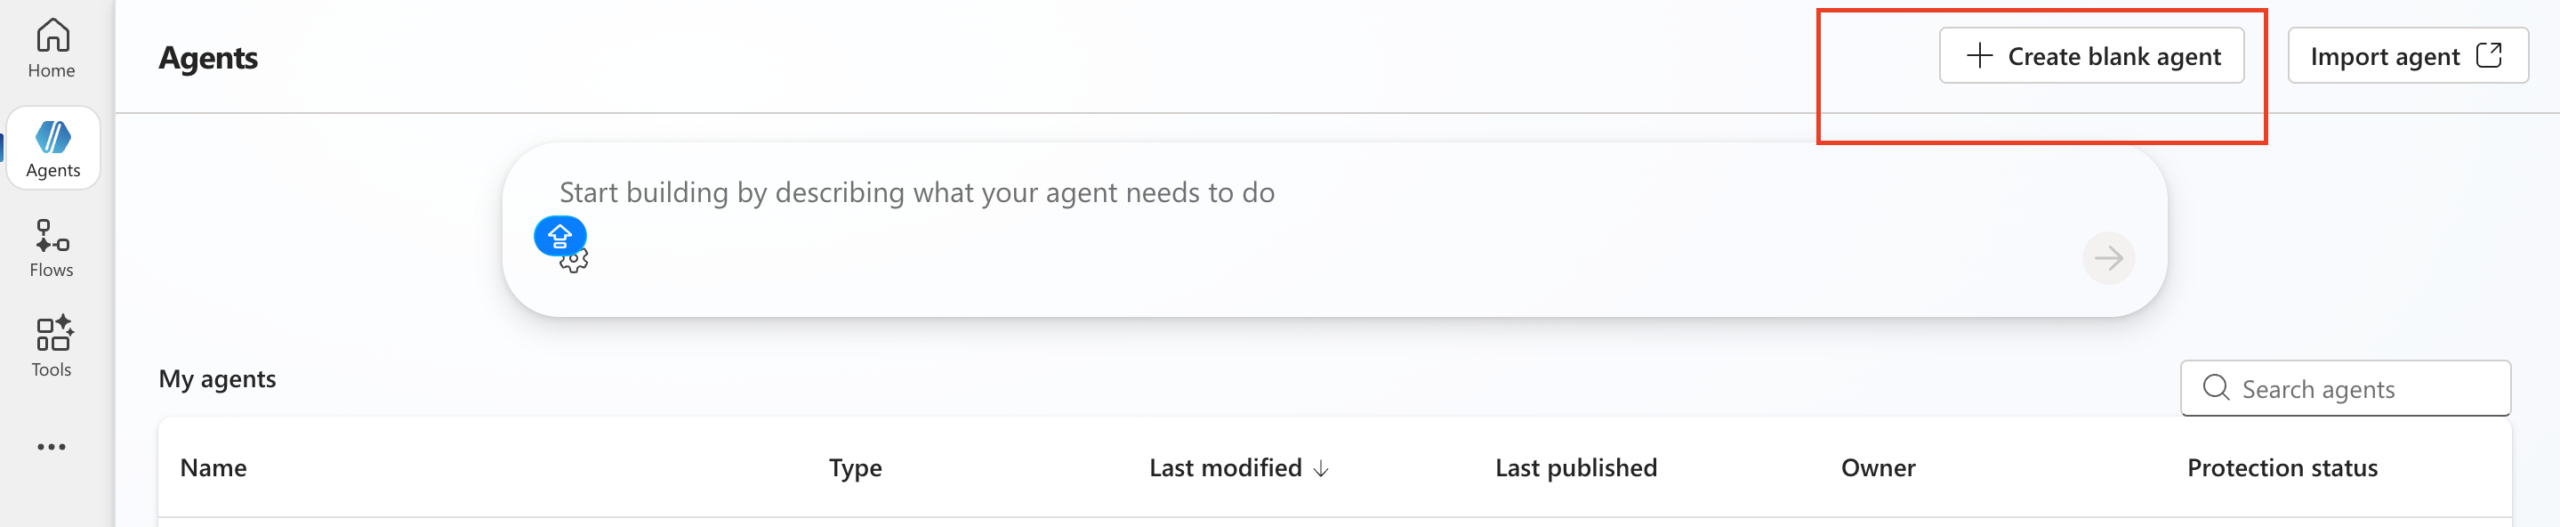
Fig 1: The Copilot Studio home screen. Click the agent option to begin creating a new agent.
A configuration dialog appears. Enter a meaningful name for your agent — something descriptive that reflects its purpose. Then click Create to initialise the agent workspace.
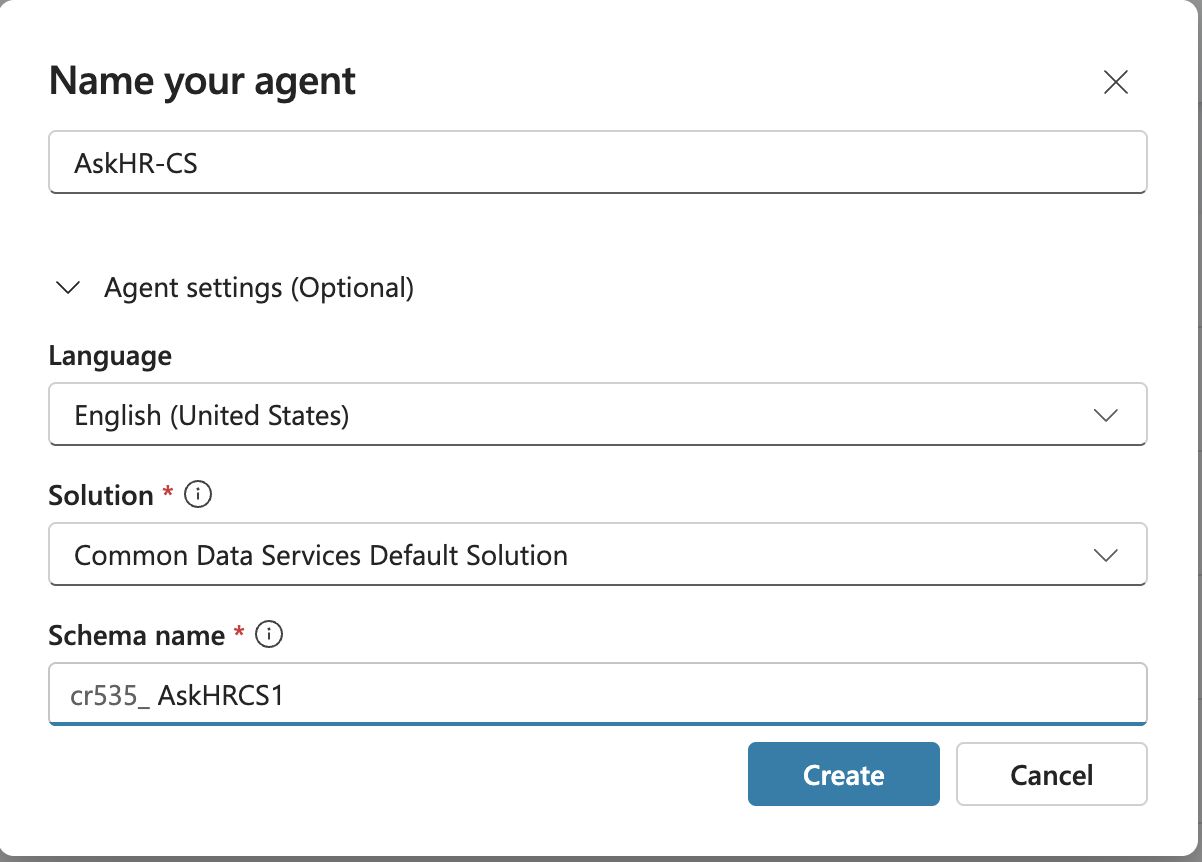
Fig 2: The new agent dialog. Enter the agent name and click Create to proceed.
Once the agent is created, you are taken to the Overview configuration panel. Here you can set:
- Name — the display name users will see
- Description — a short summary of what the agent does and who it is for
- Instructions — define the agent’s persona, rules, and behavior (you can refine these later)
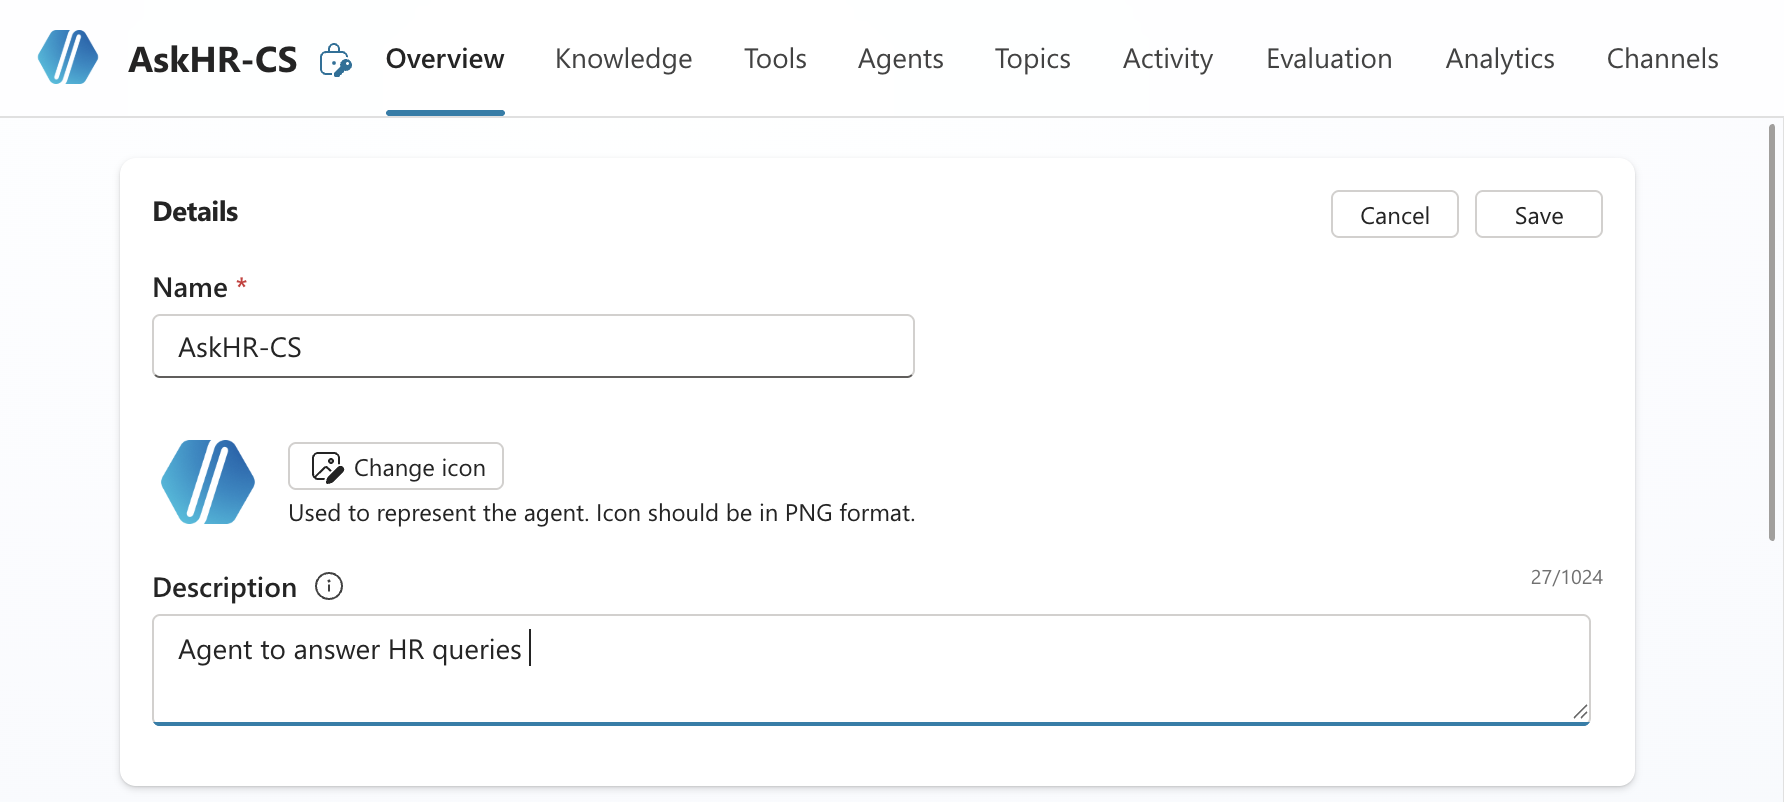
Fig 3: The Overview panel — enter the agent name and a clear description that will help users understand its purpose.
Scroll down the Overview panel until you see the Knowledge section. Click Add knowledge to connect the agent to a data source. This is where you ground the Copilot Studio agent SharePoint connection so it answers from your documents rather than general AI knowledge.
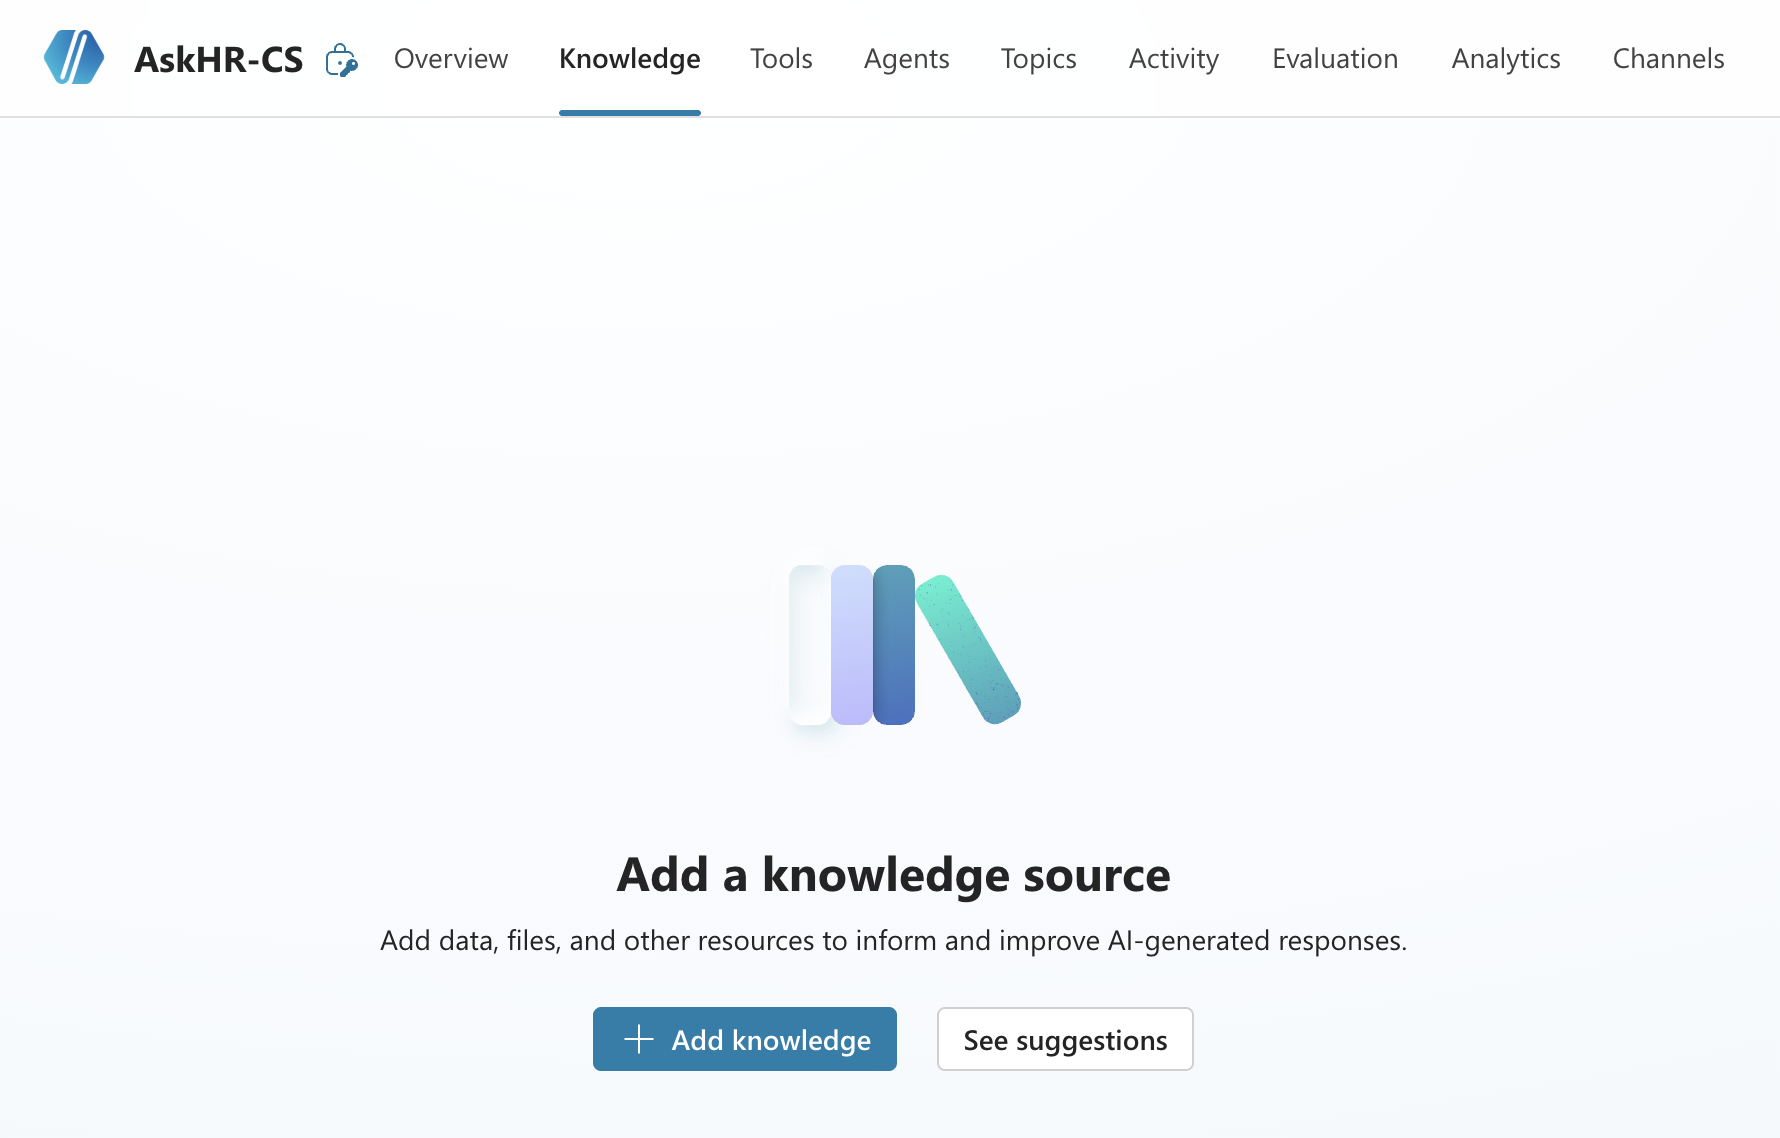
Fig 4: The Knowledge section in the Overview panel. Click Add knowledge to connect a data source to the agent.
A source picker dialog appears. Select SharePoint as the knowledge source type, then click Browse to navigate to your SharePoint site and choose the document library you want to use for your Copilot Studio agent SharePoint integration.
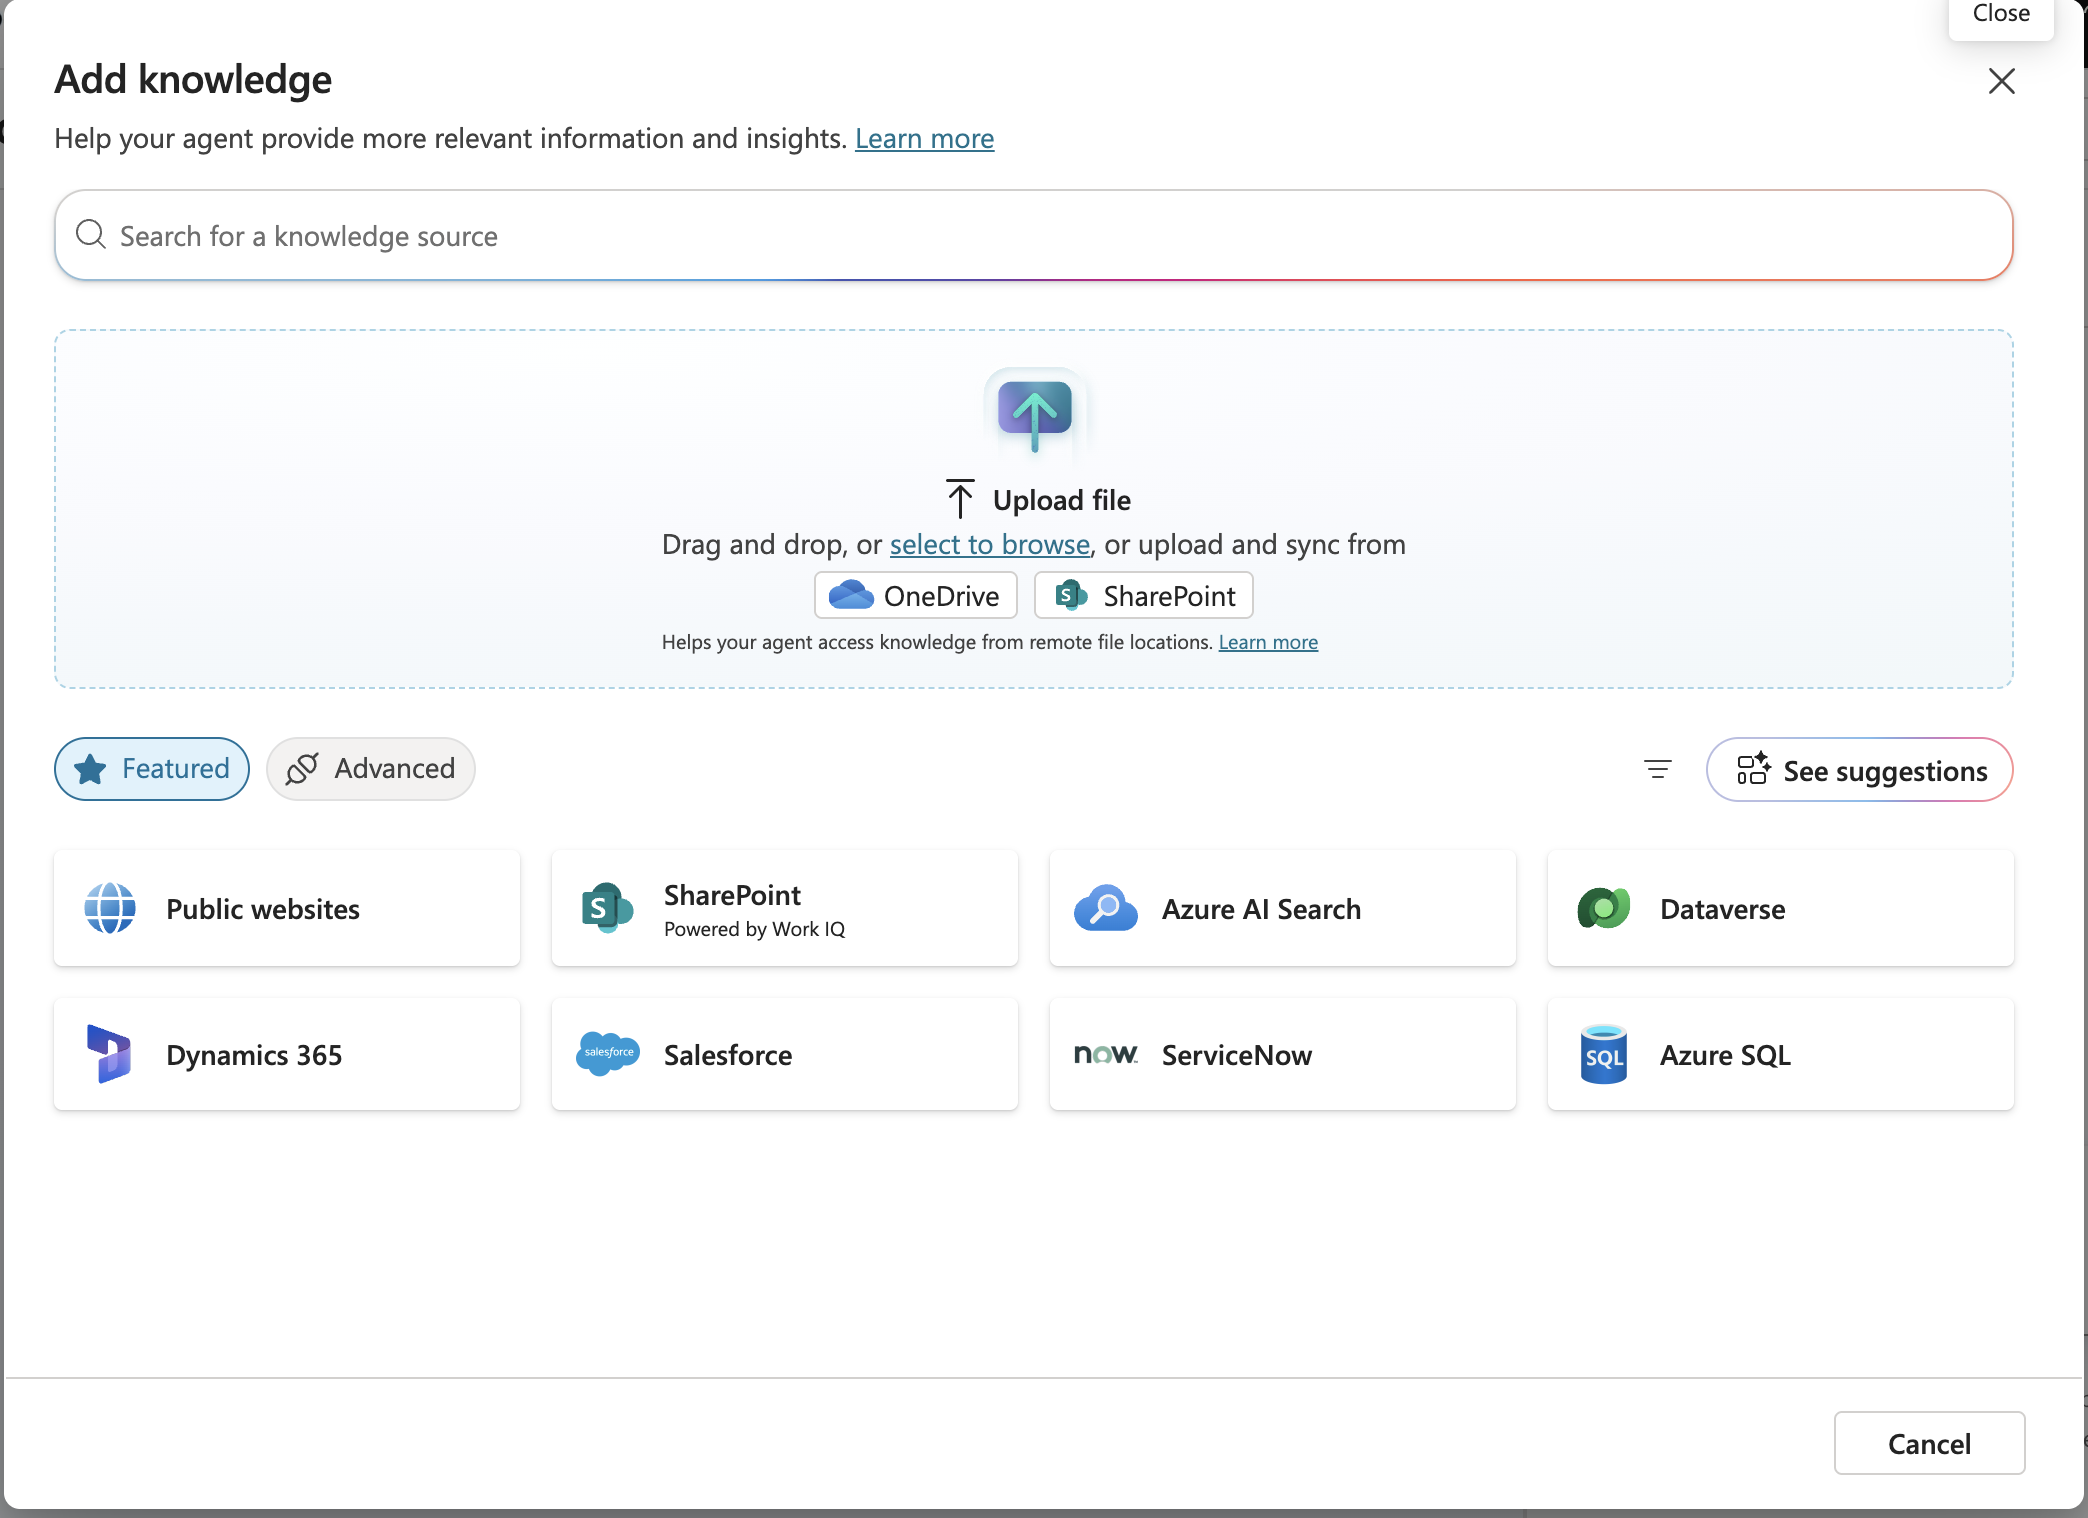
Fig 5: The knowledge source picker. Select SharePoint and click Browse to locate your document library.

Fig 6: Browsing SharePoint to select the target document library as the knowledge source.
After browsing, confirm your document library selection. You can choose:
- A specific document library — if your knowledge source is scoped to one library
- A site collection URL — if you want to include the entire SharePoint site as the source
For this demo, we are scoping to a specific document library. Once confirmed, click Add source, then Confirm selection, and finally Add to agent.
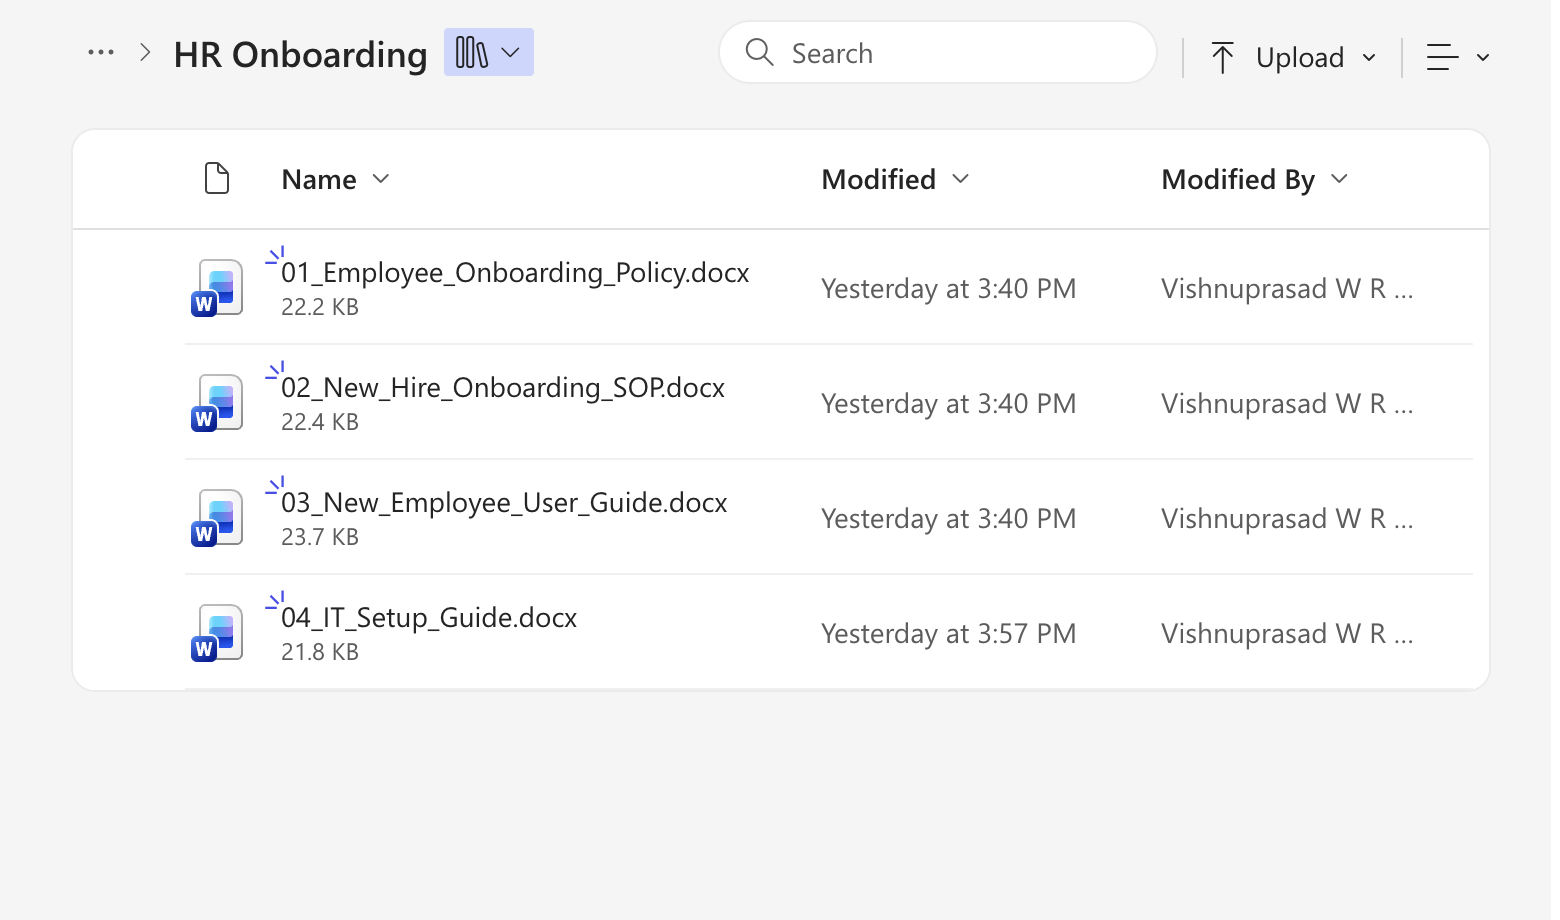
Fig 7: Confirming the document library selection. Click Add source → Confirm selection → Add to agent to complete the knowledge connection.
With knowledge configured, the next step is to make the agent available in Microsoft Teams. In the left navigation of the agent workspace, click the Channels tab.
Under Microsoft channels, select Microsoft 365 Copilot and Microsoft Teams, then click Add Channel.
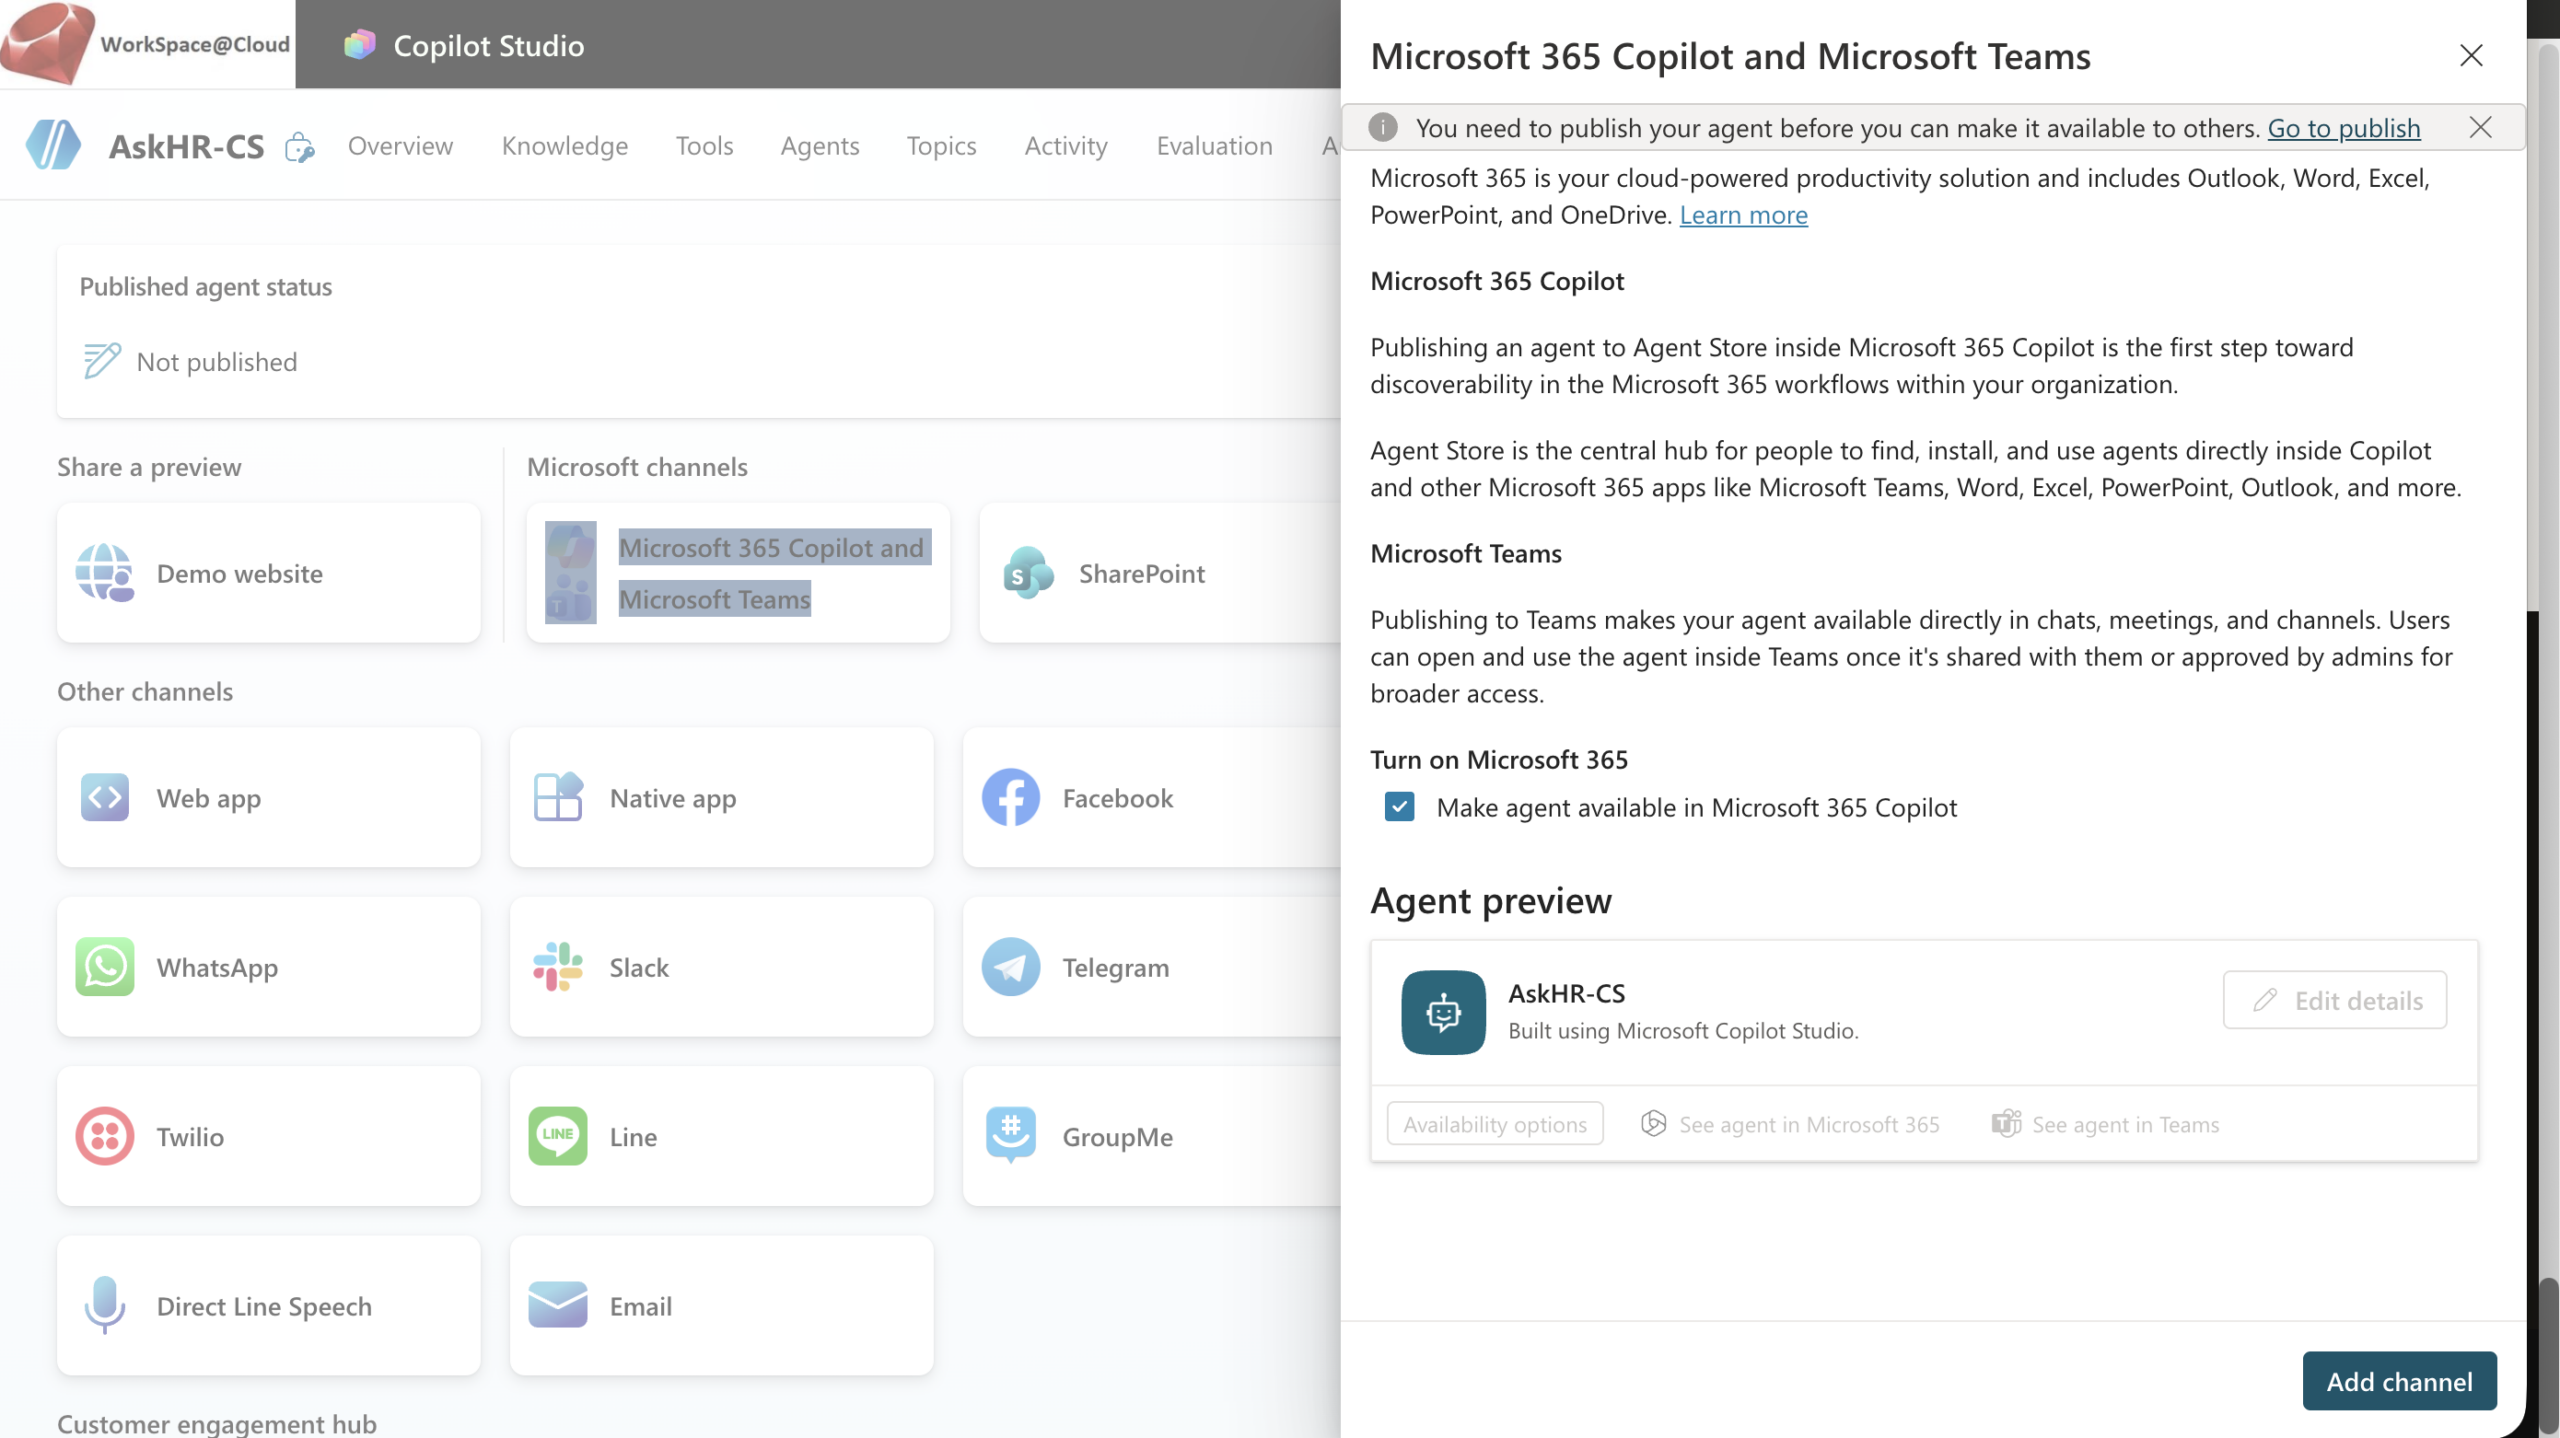
Fig 8: The Channels tab. Navigate to Microsoft channels → Microsoft 365 Copilot and Microsoft Teams and click Add Channel.
Once the Teams channel is added, check the Force newest version option to ensure users always interact with the most recent published build of the agent. Then click Publish.
Wait for the publish confirmation — this typically takes a few seconds. The Copilot Studio agent SharePoint setup is now live and can be deployed to Teams.
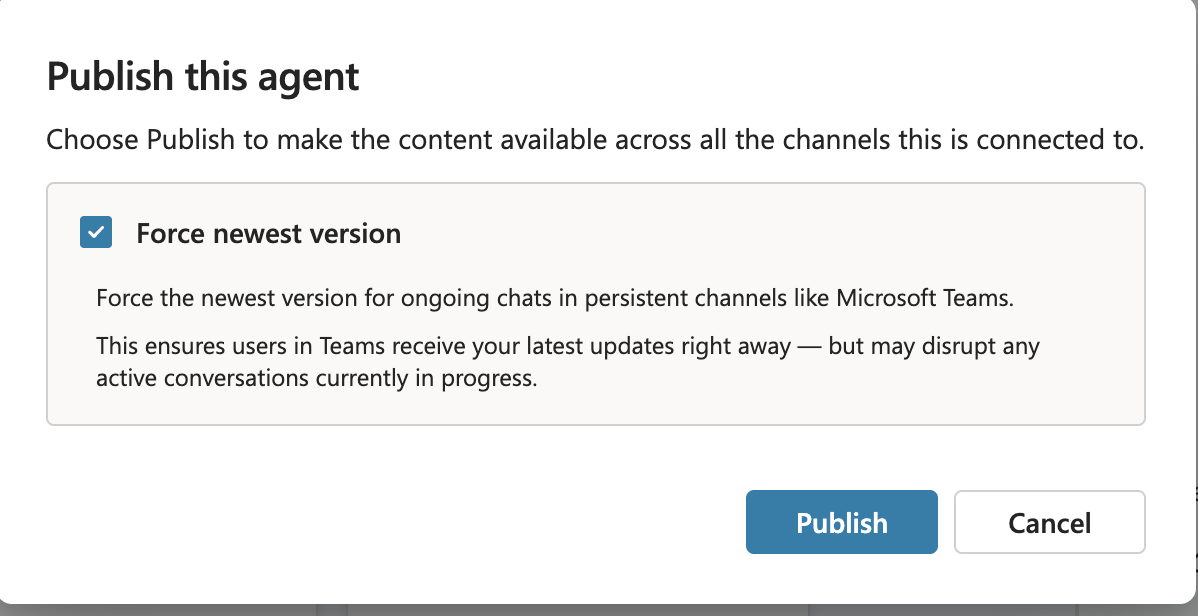
Fig 9: The agent with the Microsoft Teams channel added. Check Force newest version and click Publish to make the agent live.
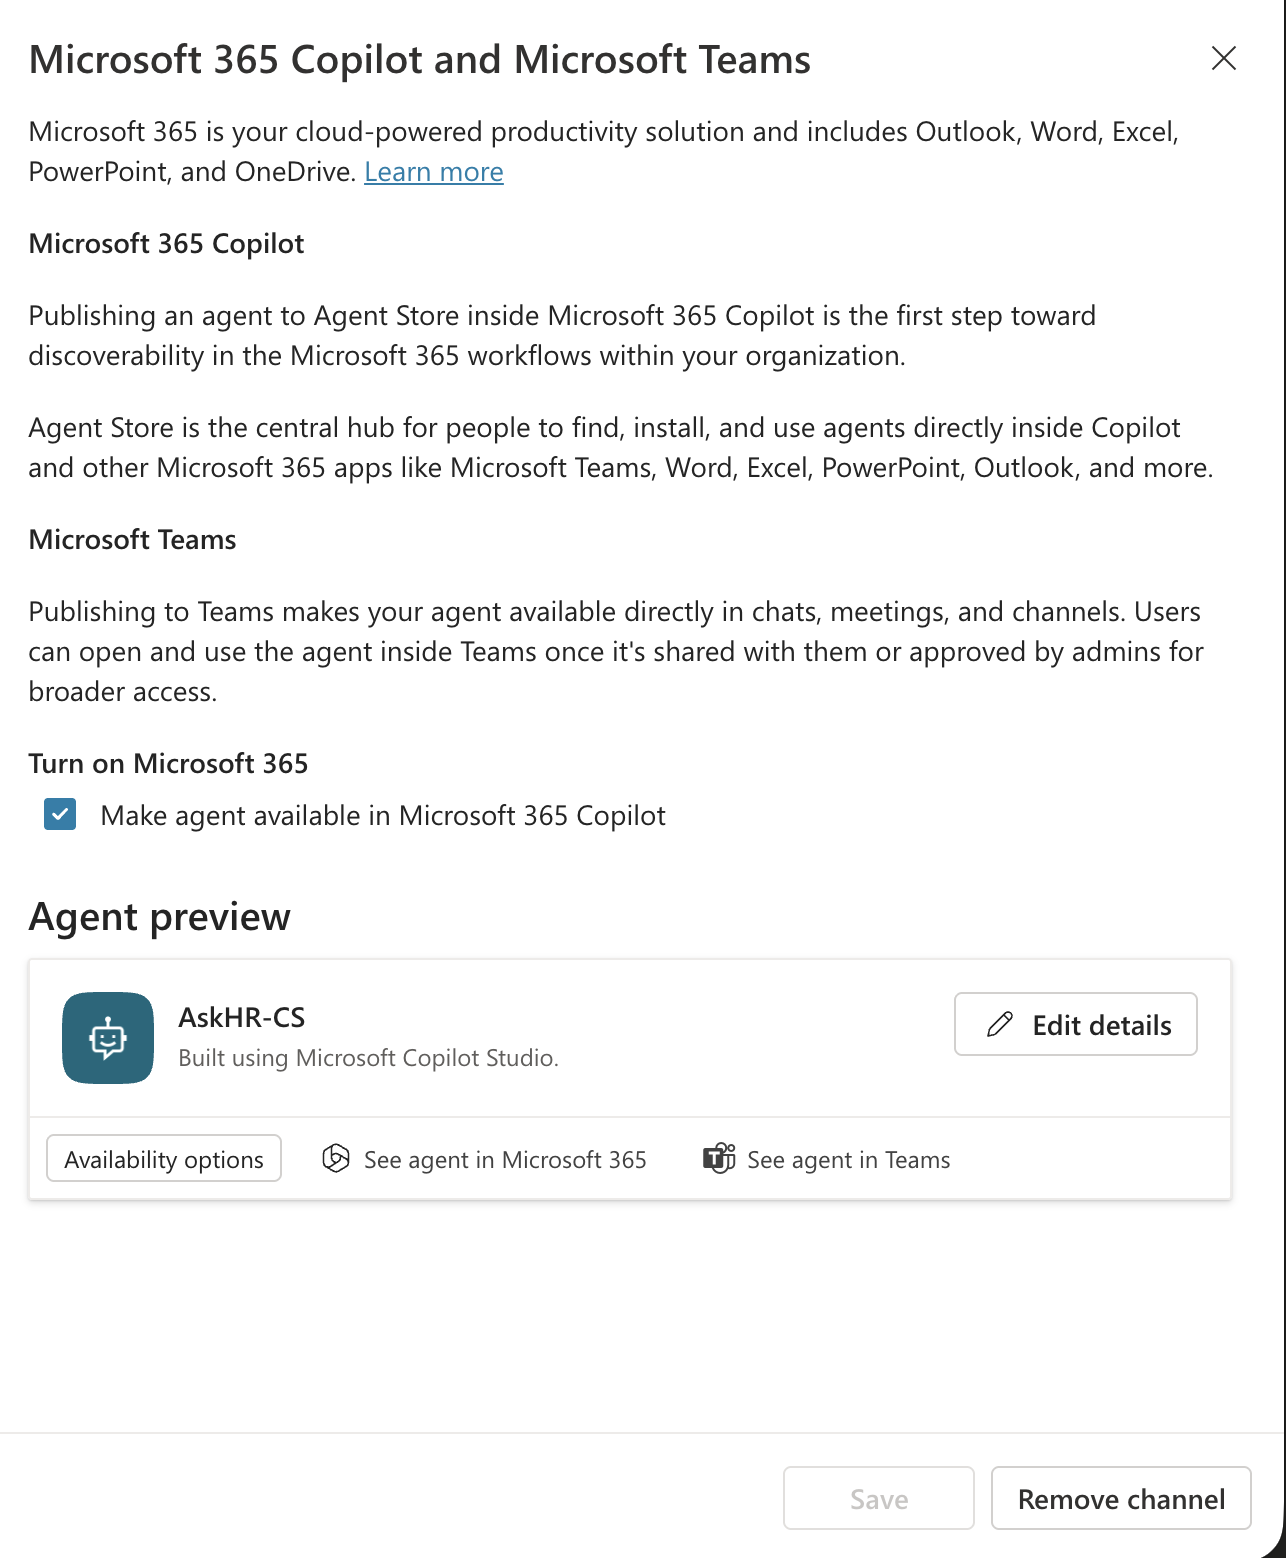
Fig 10: Agent published successfully. The status confirms the agent is now available for deployment.
Navigate back to the Channels tab in the agent workspace. Select Microsoft channels → Teams and click Availability options.
You will see two options:
- Copy link — the fastest way to add the agent to a Teams channel directly
- Download zip — an app package that can be submitted to the Teams admin centre for organisation-wide approval and distribution
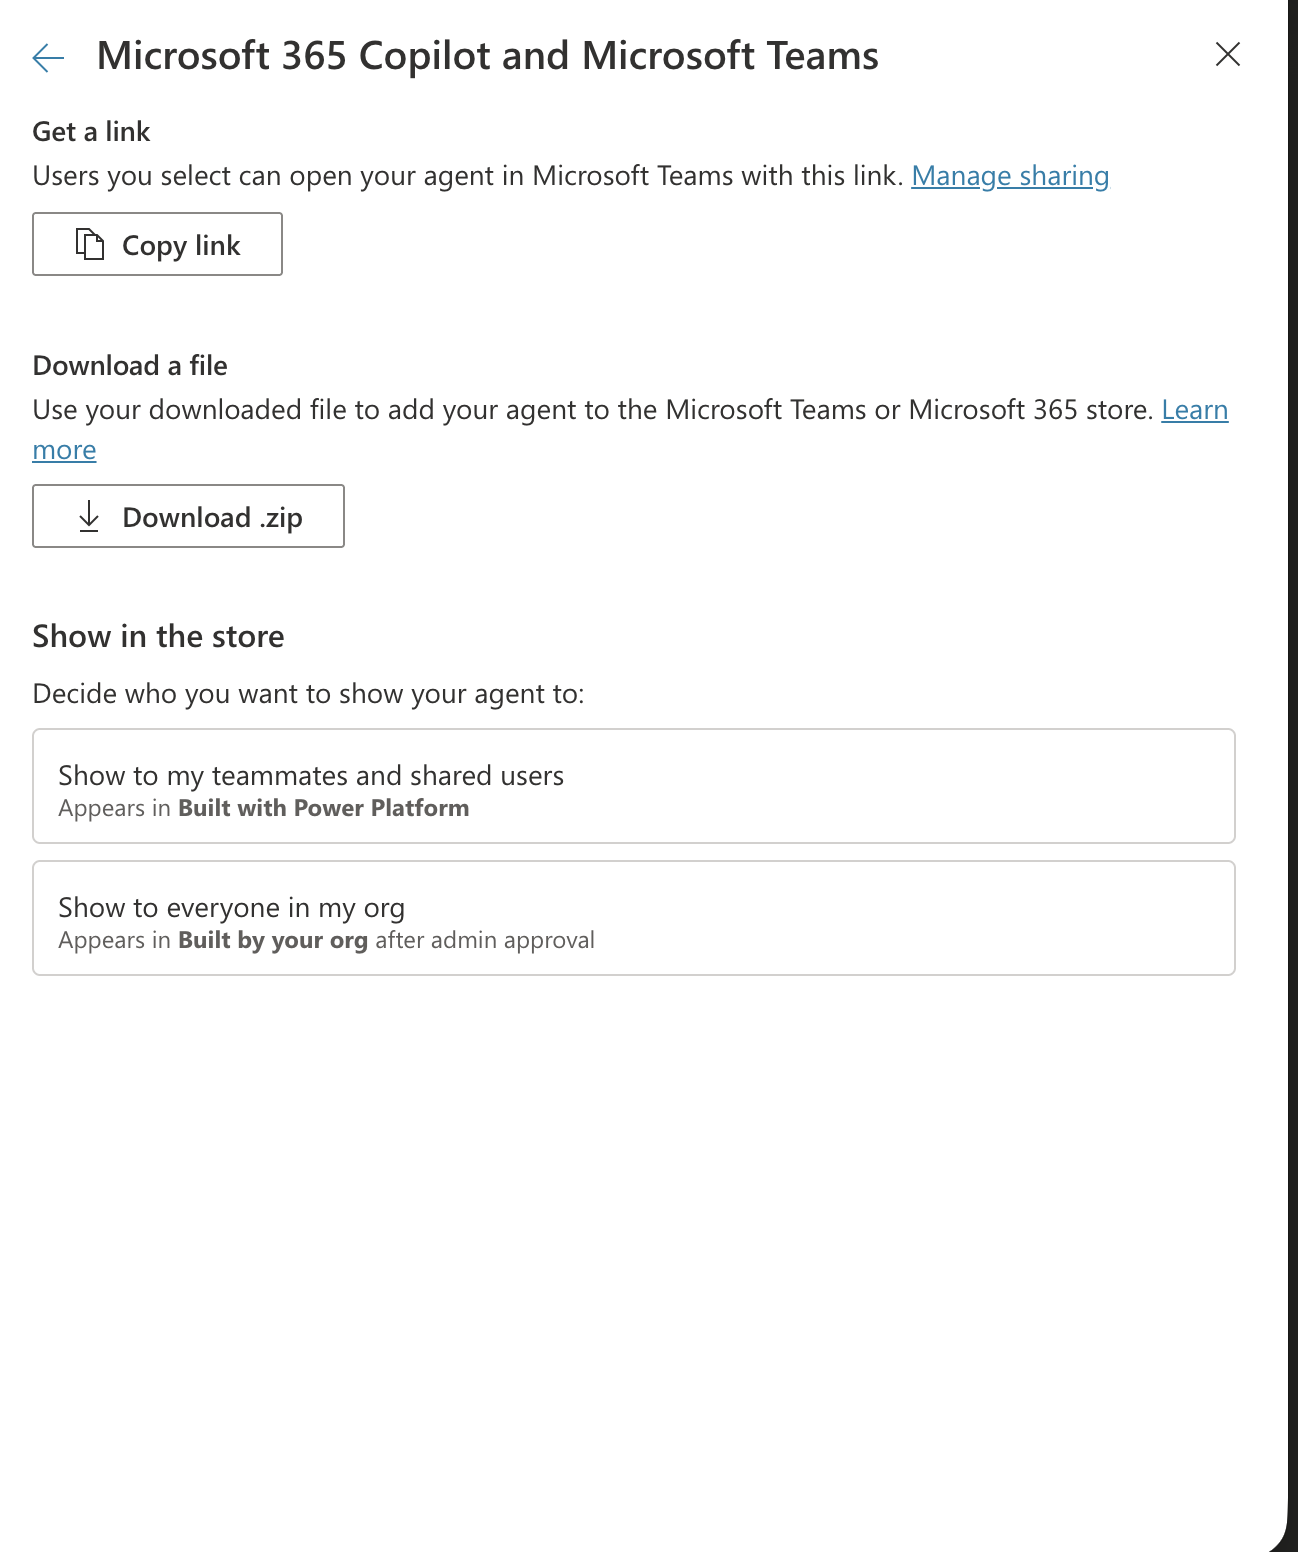
Fig 11: The availability options for Teams deployment. Choose Copy link for immediate use or Download zip for IT-managed deployment via the Teams admin centre.
Open the Microsoft Teams client (desktop or web). Navigate to the channel where you want to add the agent.
In the message box, paste the copied agent link and post it. Wait a moment — Teams will process the link and surface an option to add the agent to the channel. Do not dismiss the prompt too quickly.
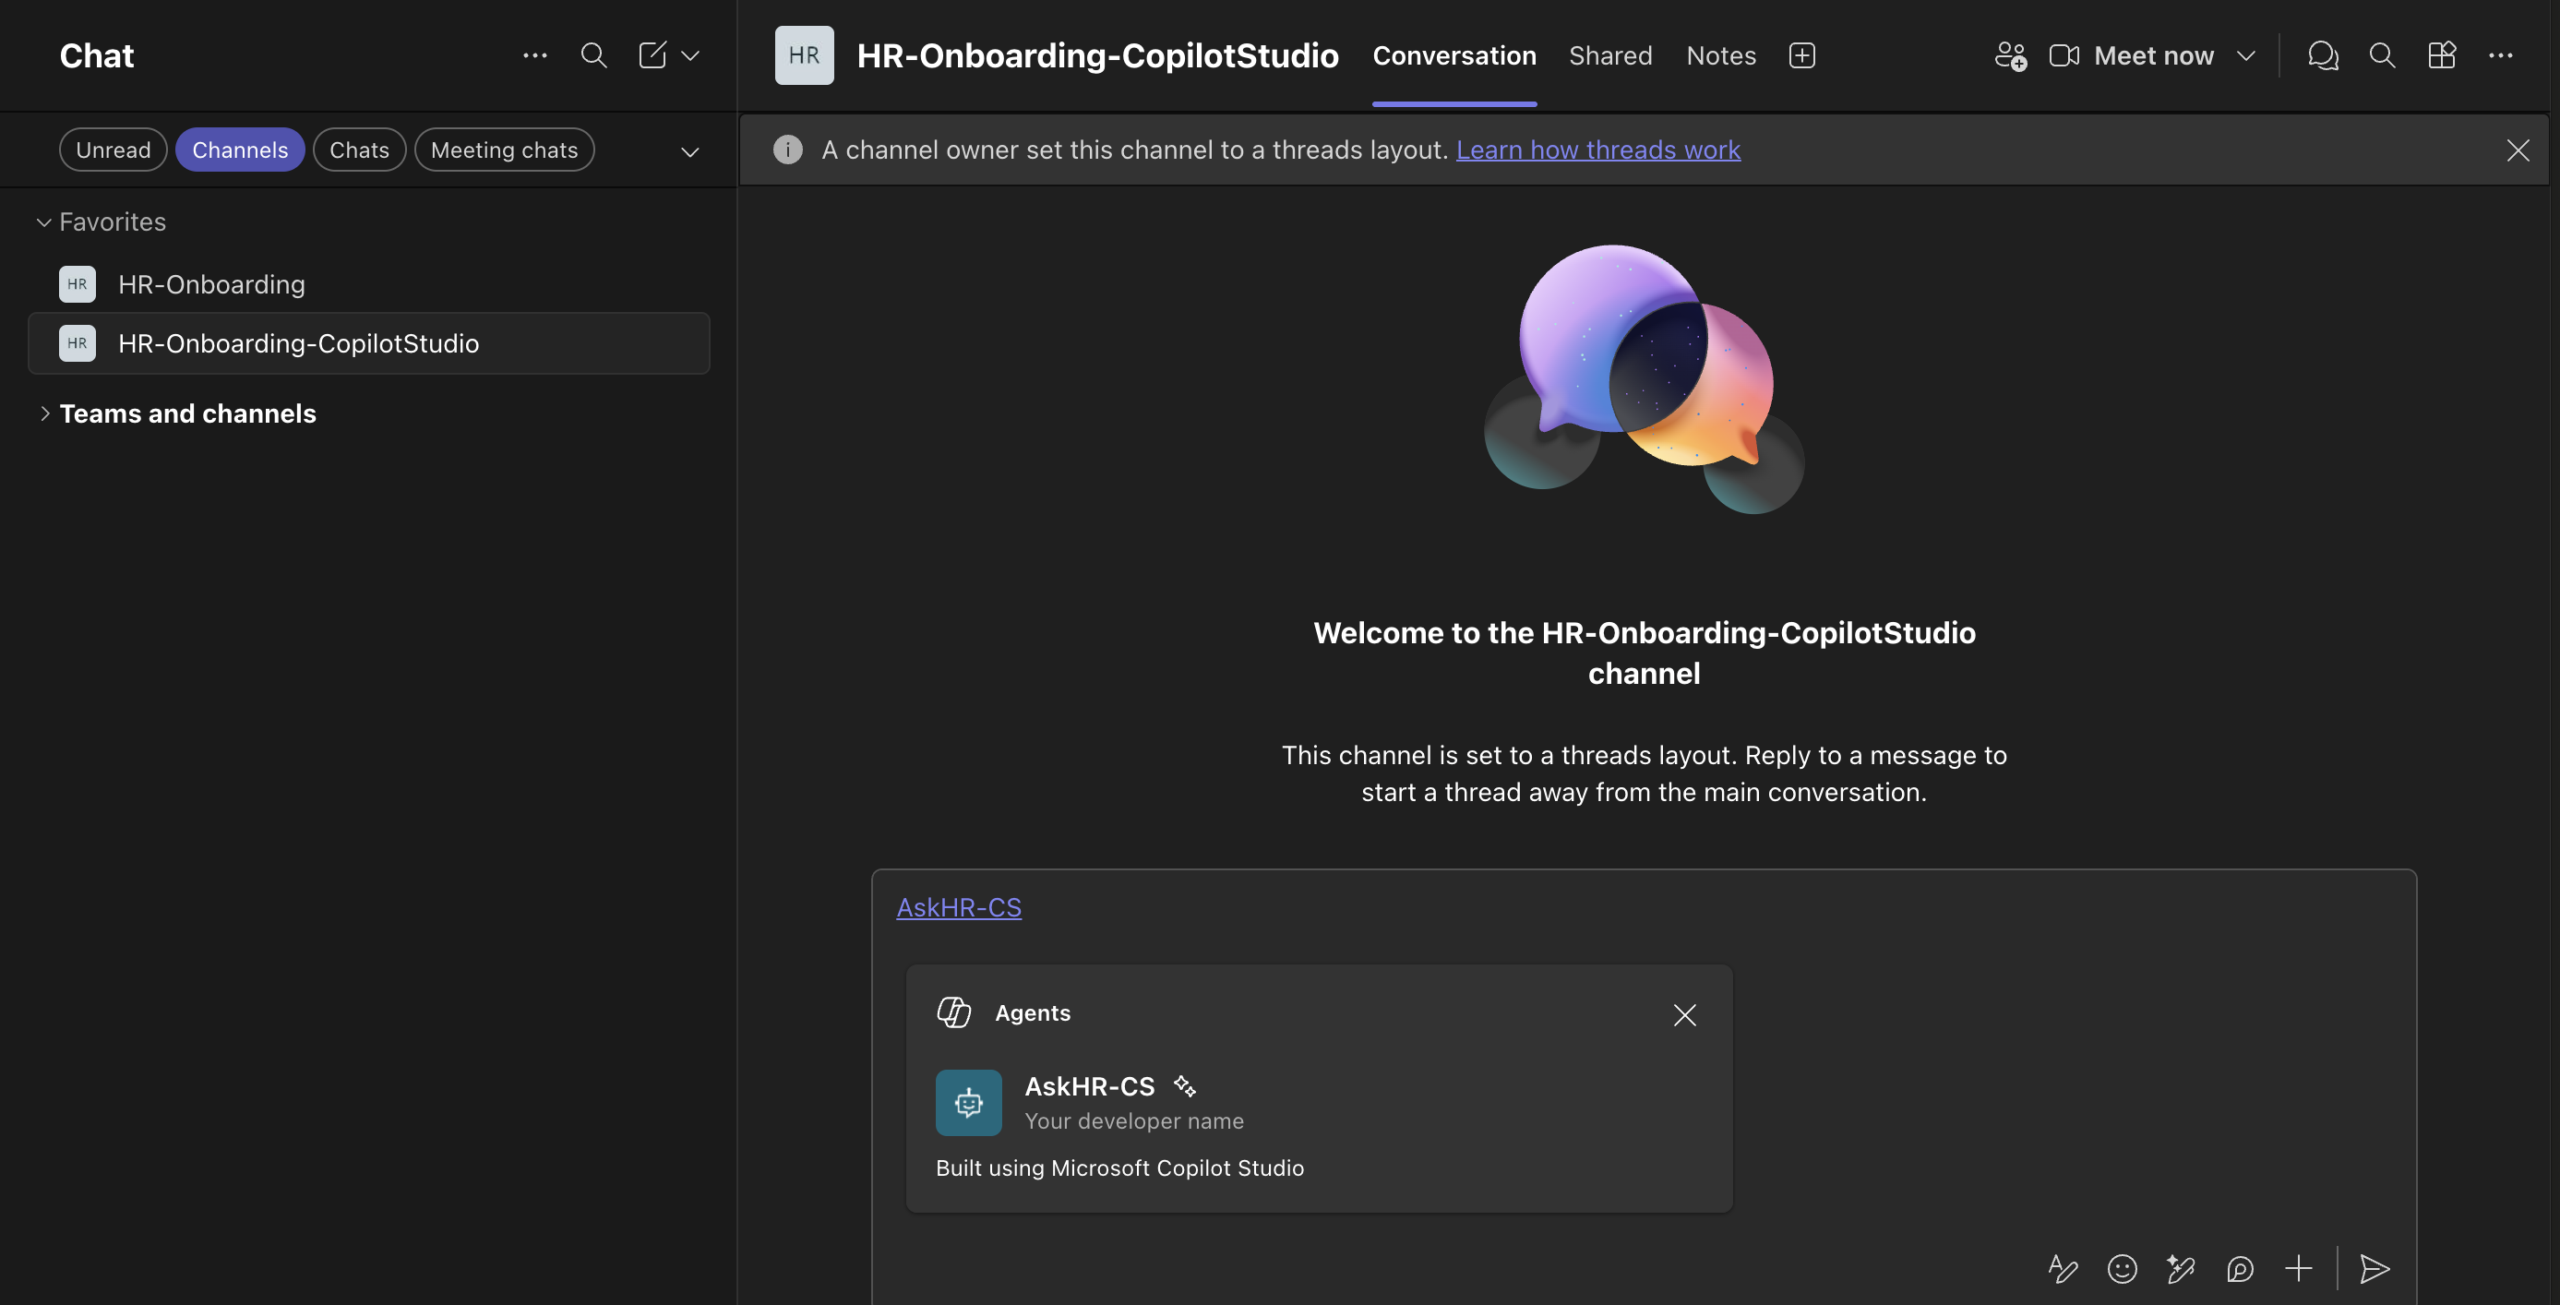
Fig 12: Paste the agent link into the Teams channel message box. Wait for the Add agent prompt to appear before posting.
When the Teams prompt appears, click Add to install the agent into the channel. All members of the channel will now have access to the Copilot Studio agent SharePoint integration.

Fig 13: The Teams confirmation dialog. Click Add to install the agent into the channel for all members.
After adding, click Open to launch the agent directly within the Teams channel. This confirms the agent is installed and ready to use.
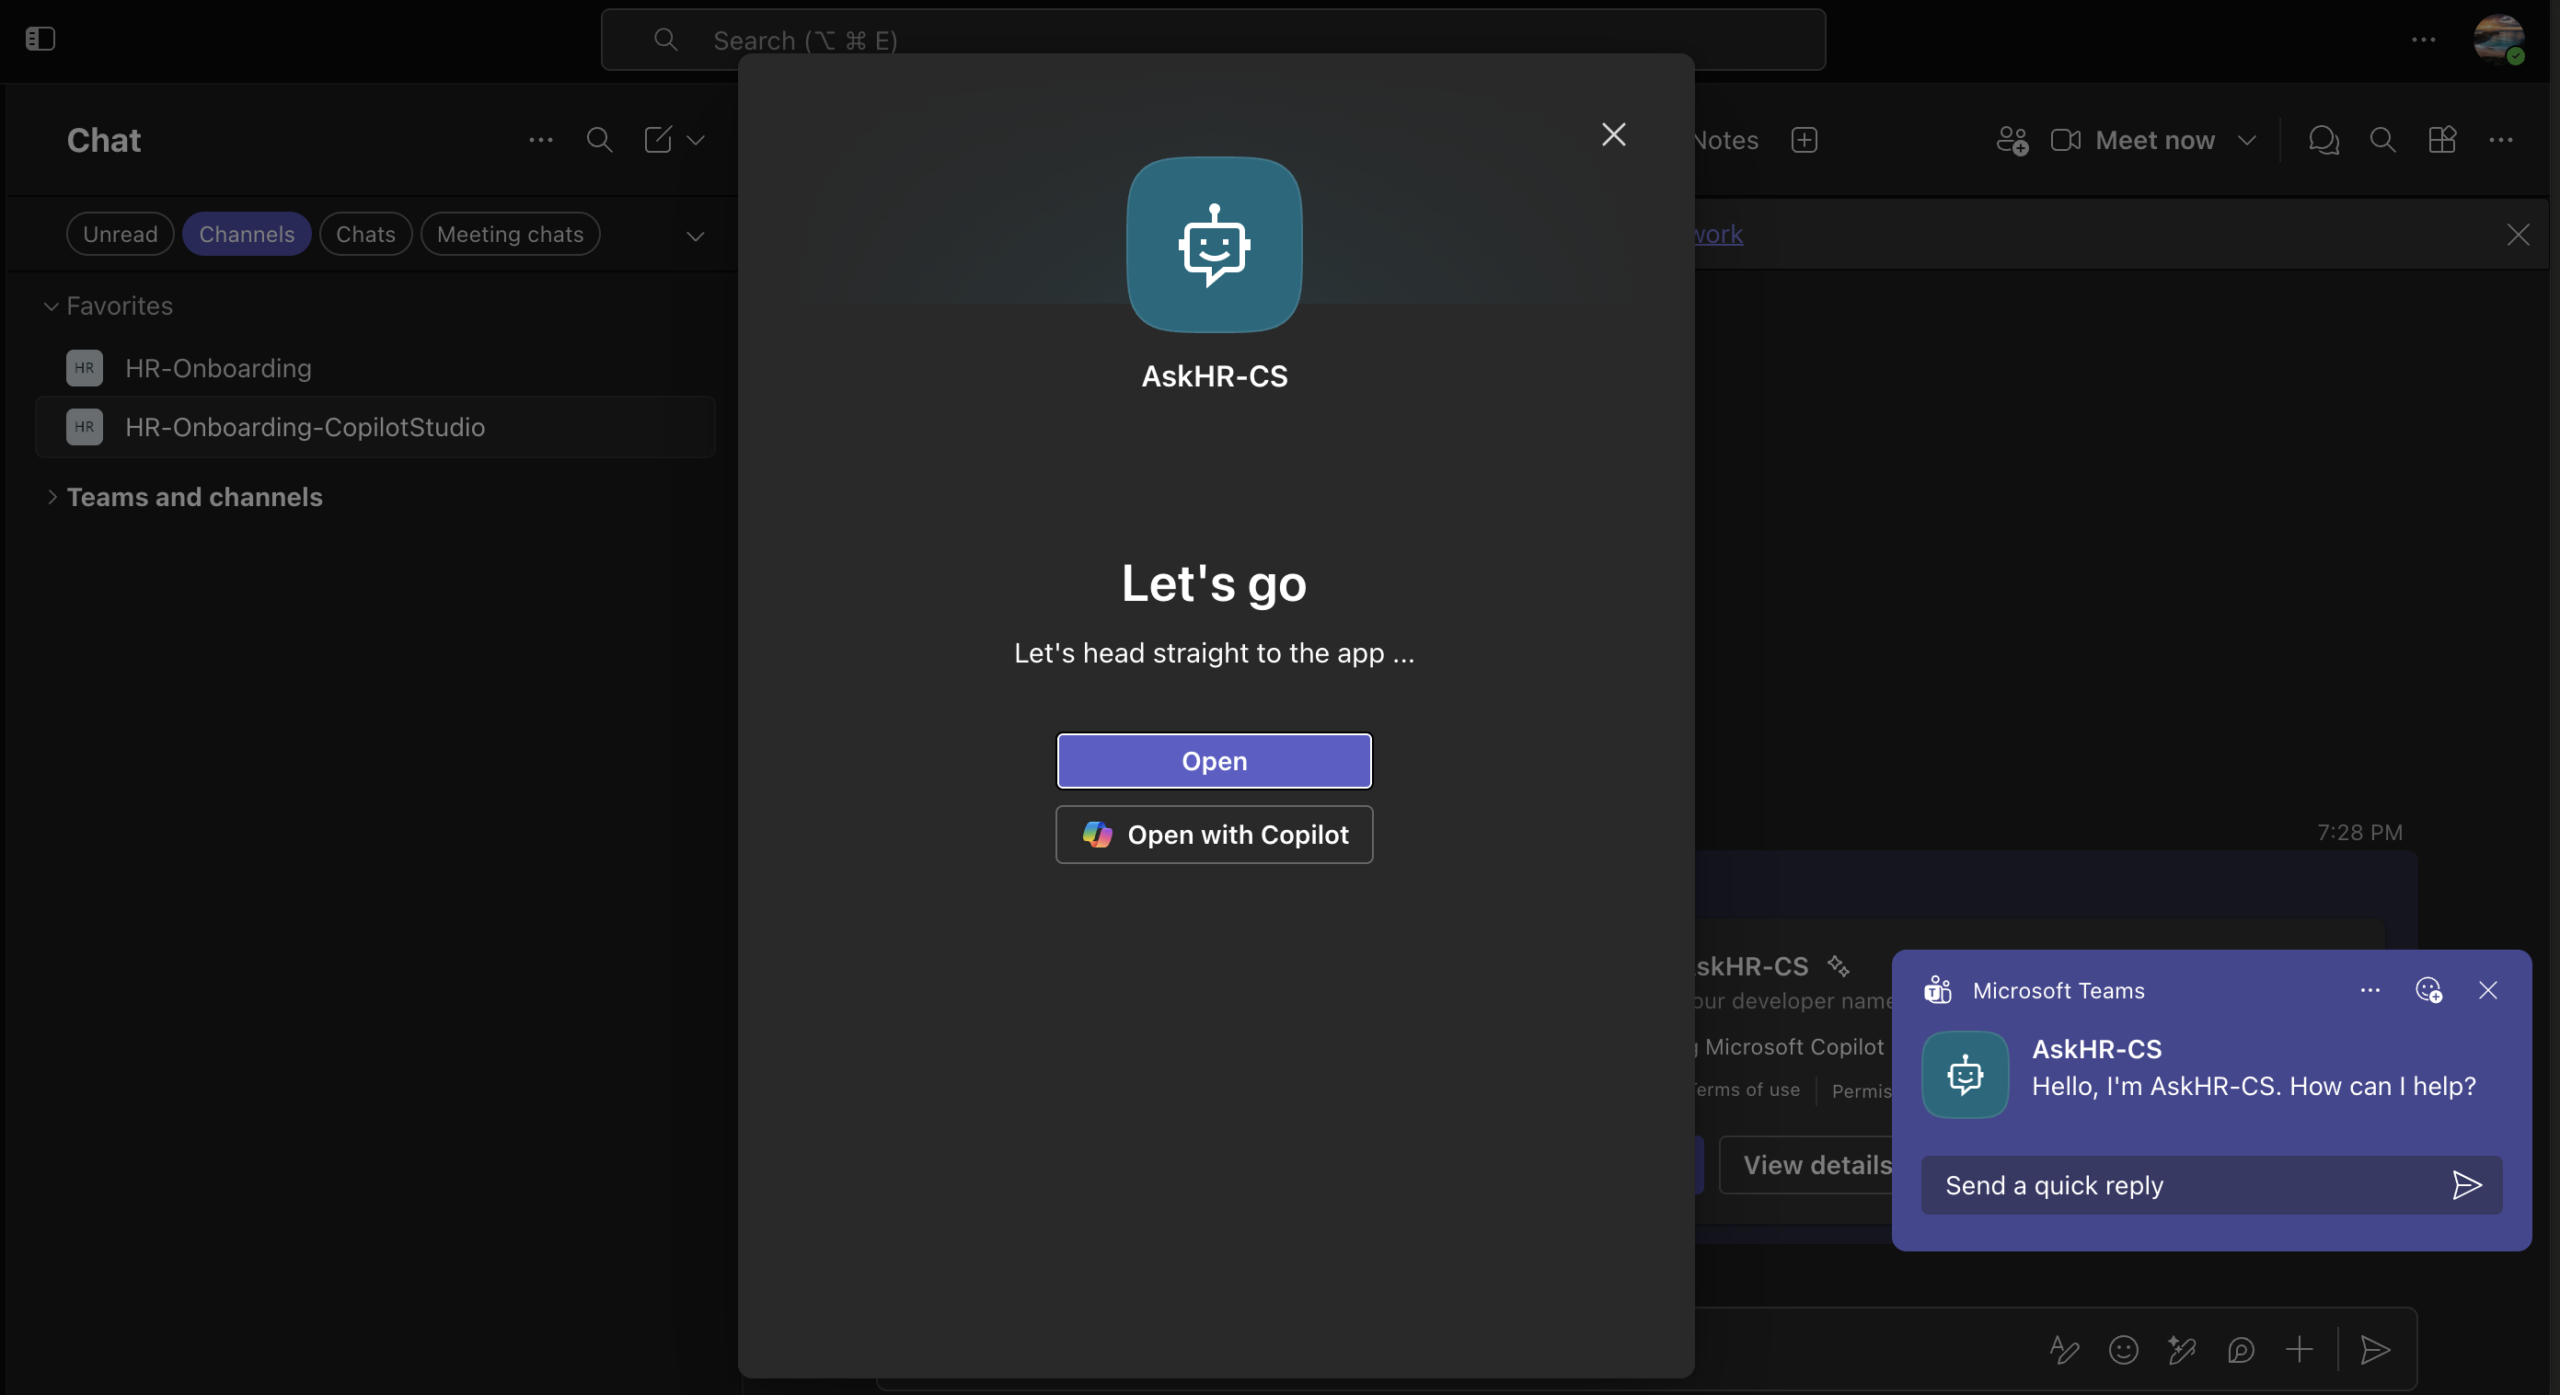
Fig 14: The agent is installed in the Teams channel. Click Open to begin using it immediately.
For regular use, pin the agent so it appears in the channel’s app bar for quick access. If you deployed via the zip package and it was approved through the admin centre, the agent will also appear in the Teams app catalogue and can be added from there by any user.
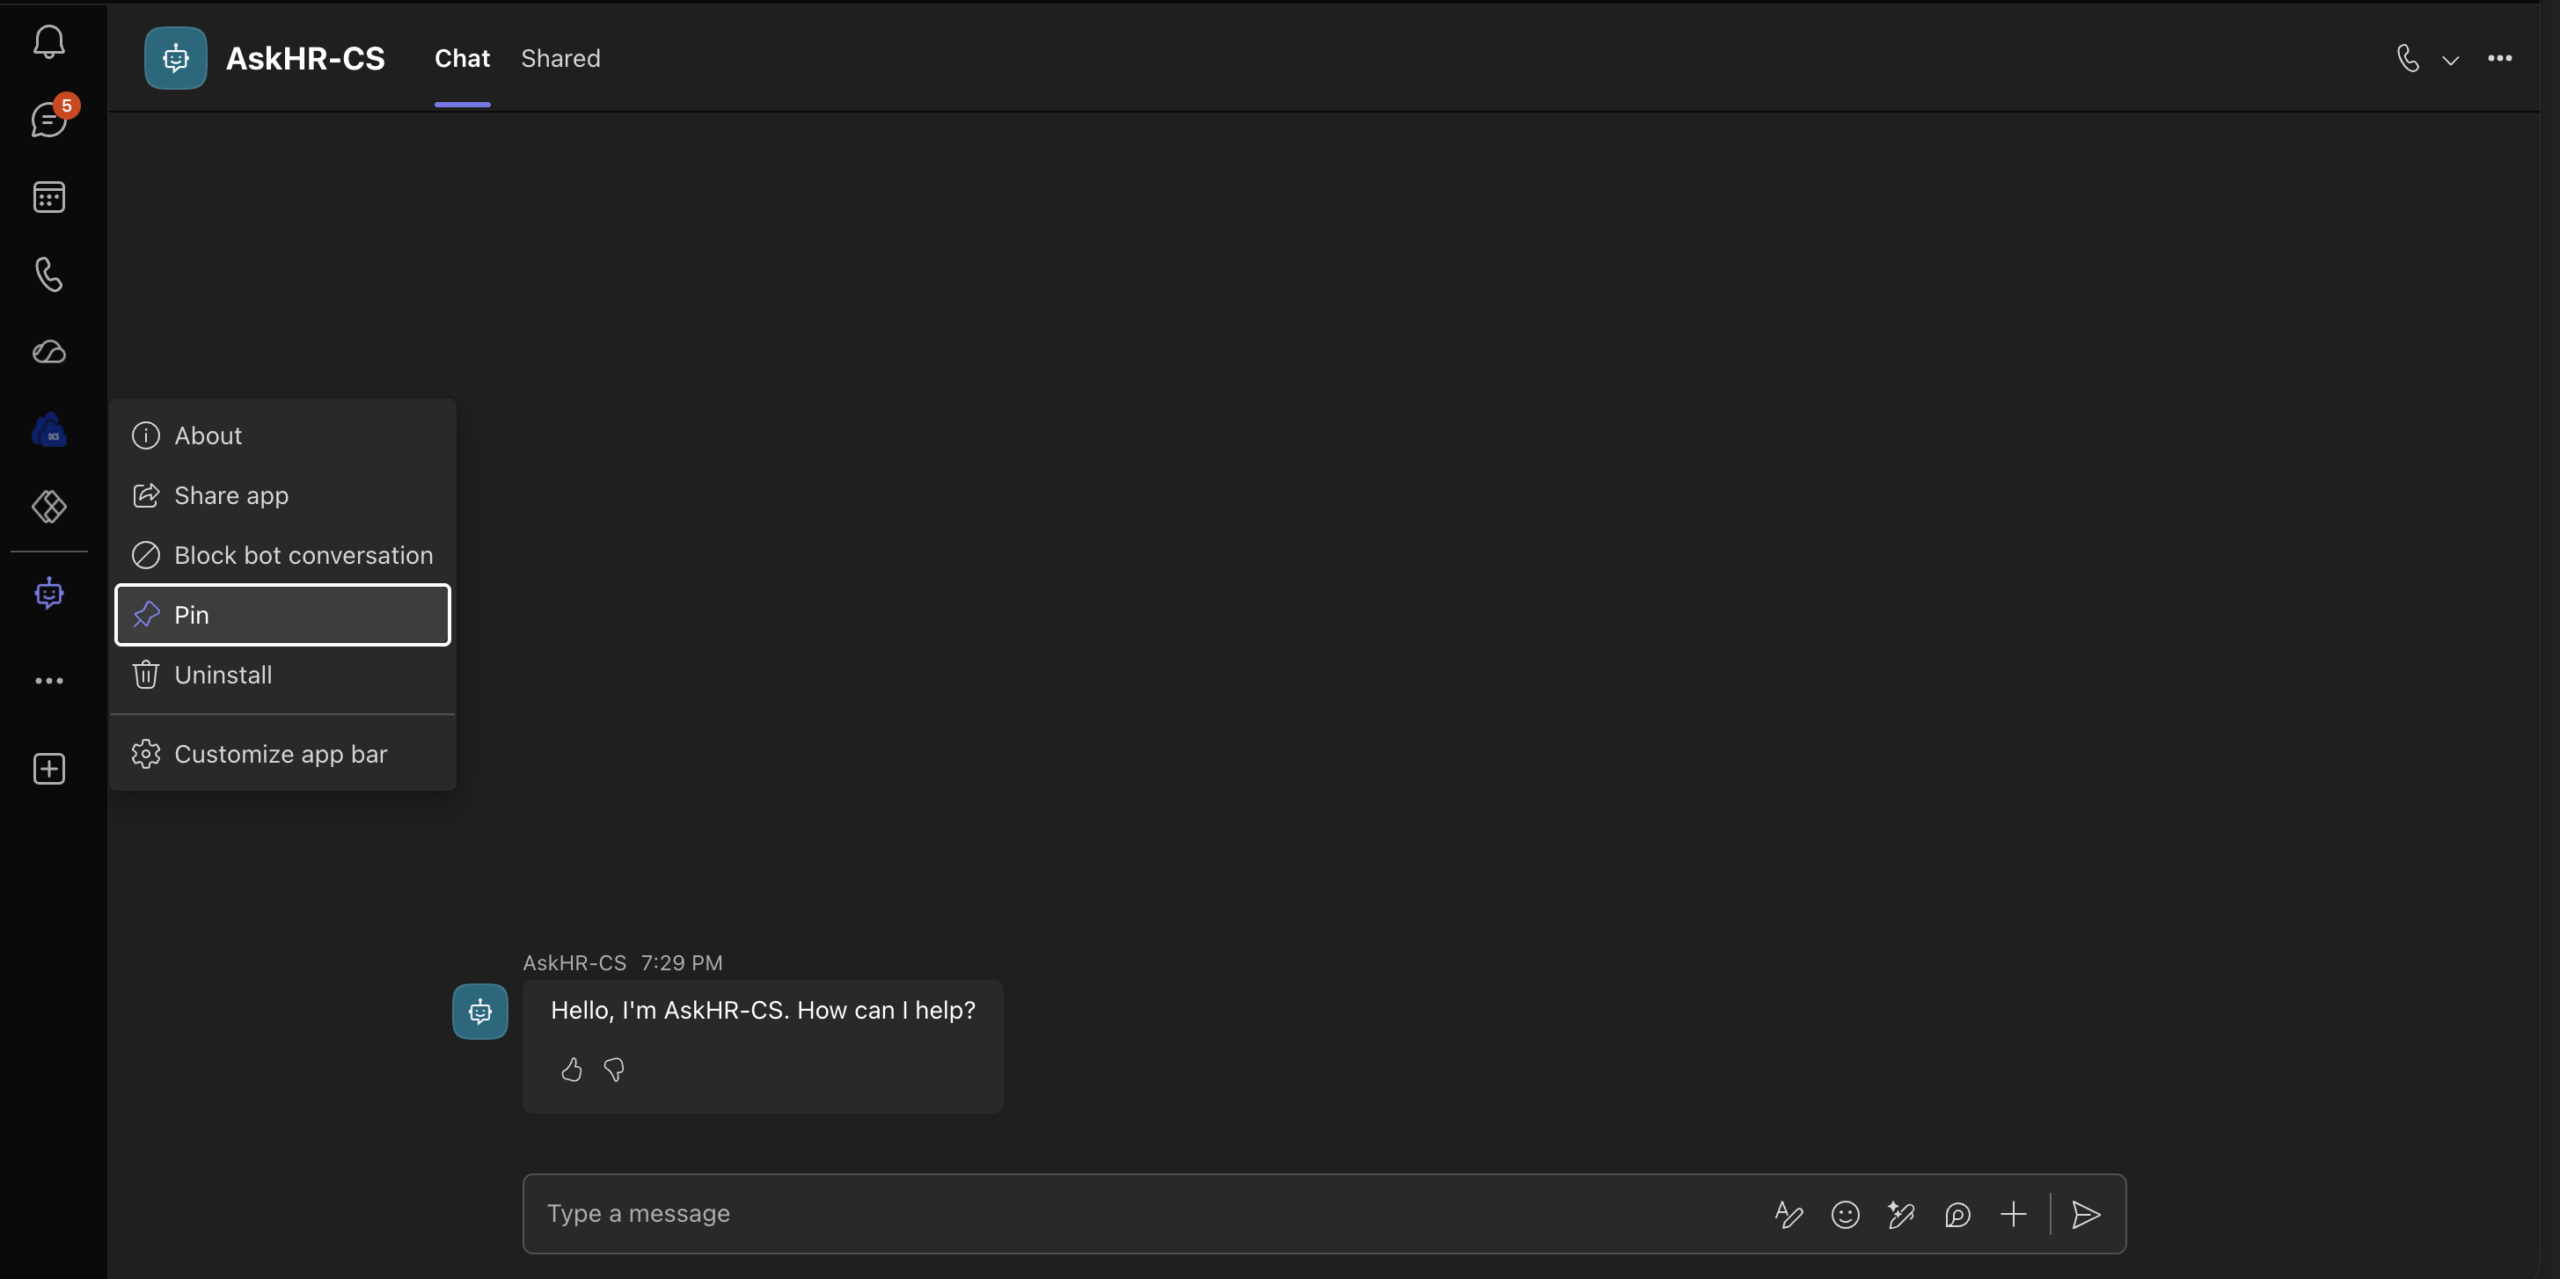
Fig 15: Pin the agent in the Teams channel for persistent, one-click access. Users can also add it from the app catalogue if deployed via zip.
The Copilot Studio agent SharePoint integration is now live. Type a question in the Teams conversation — just as you would ask a colleague. The agent reads from your connected SharePoint document library and returns a grounded, accurate answer.
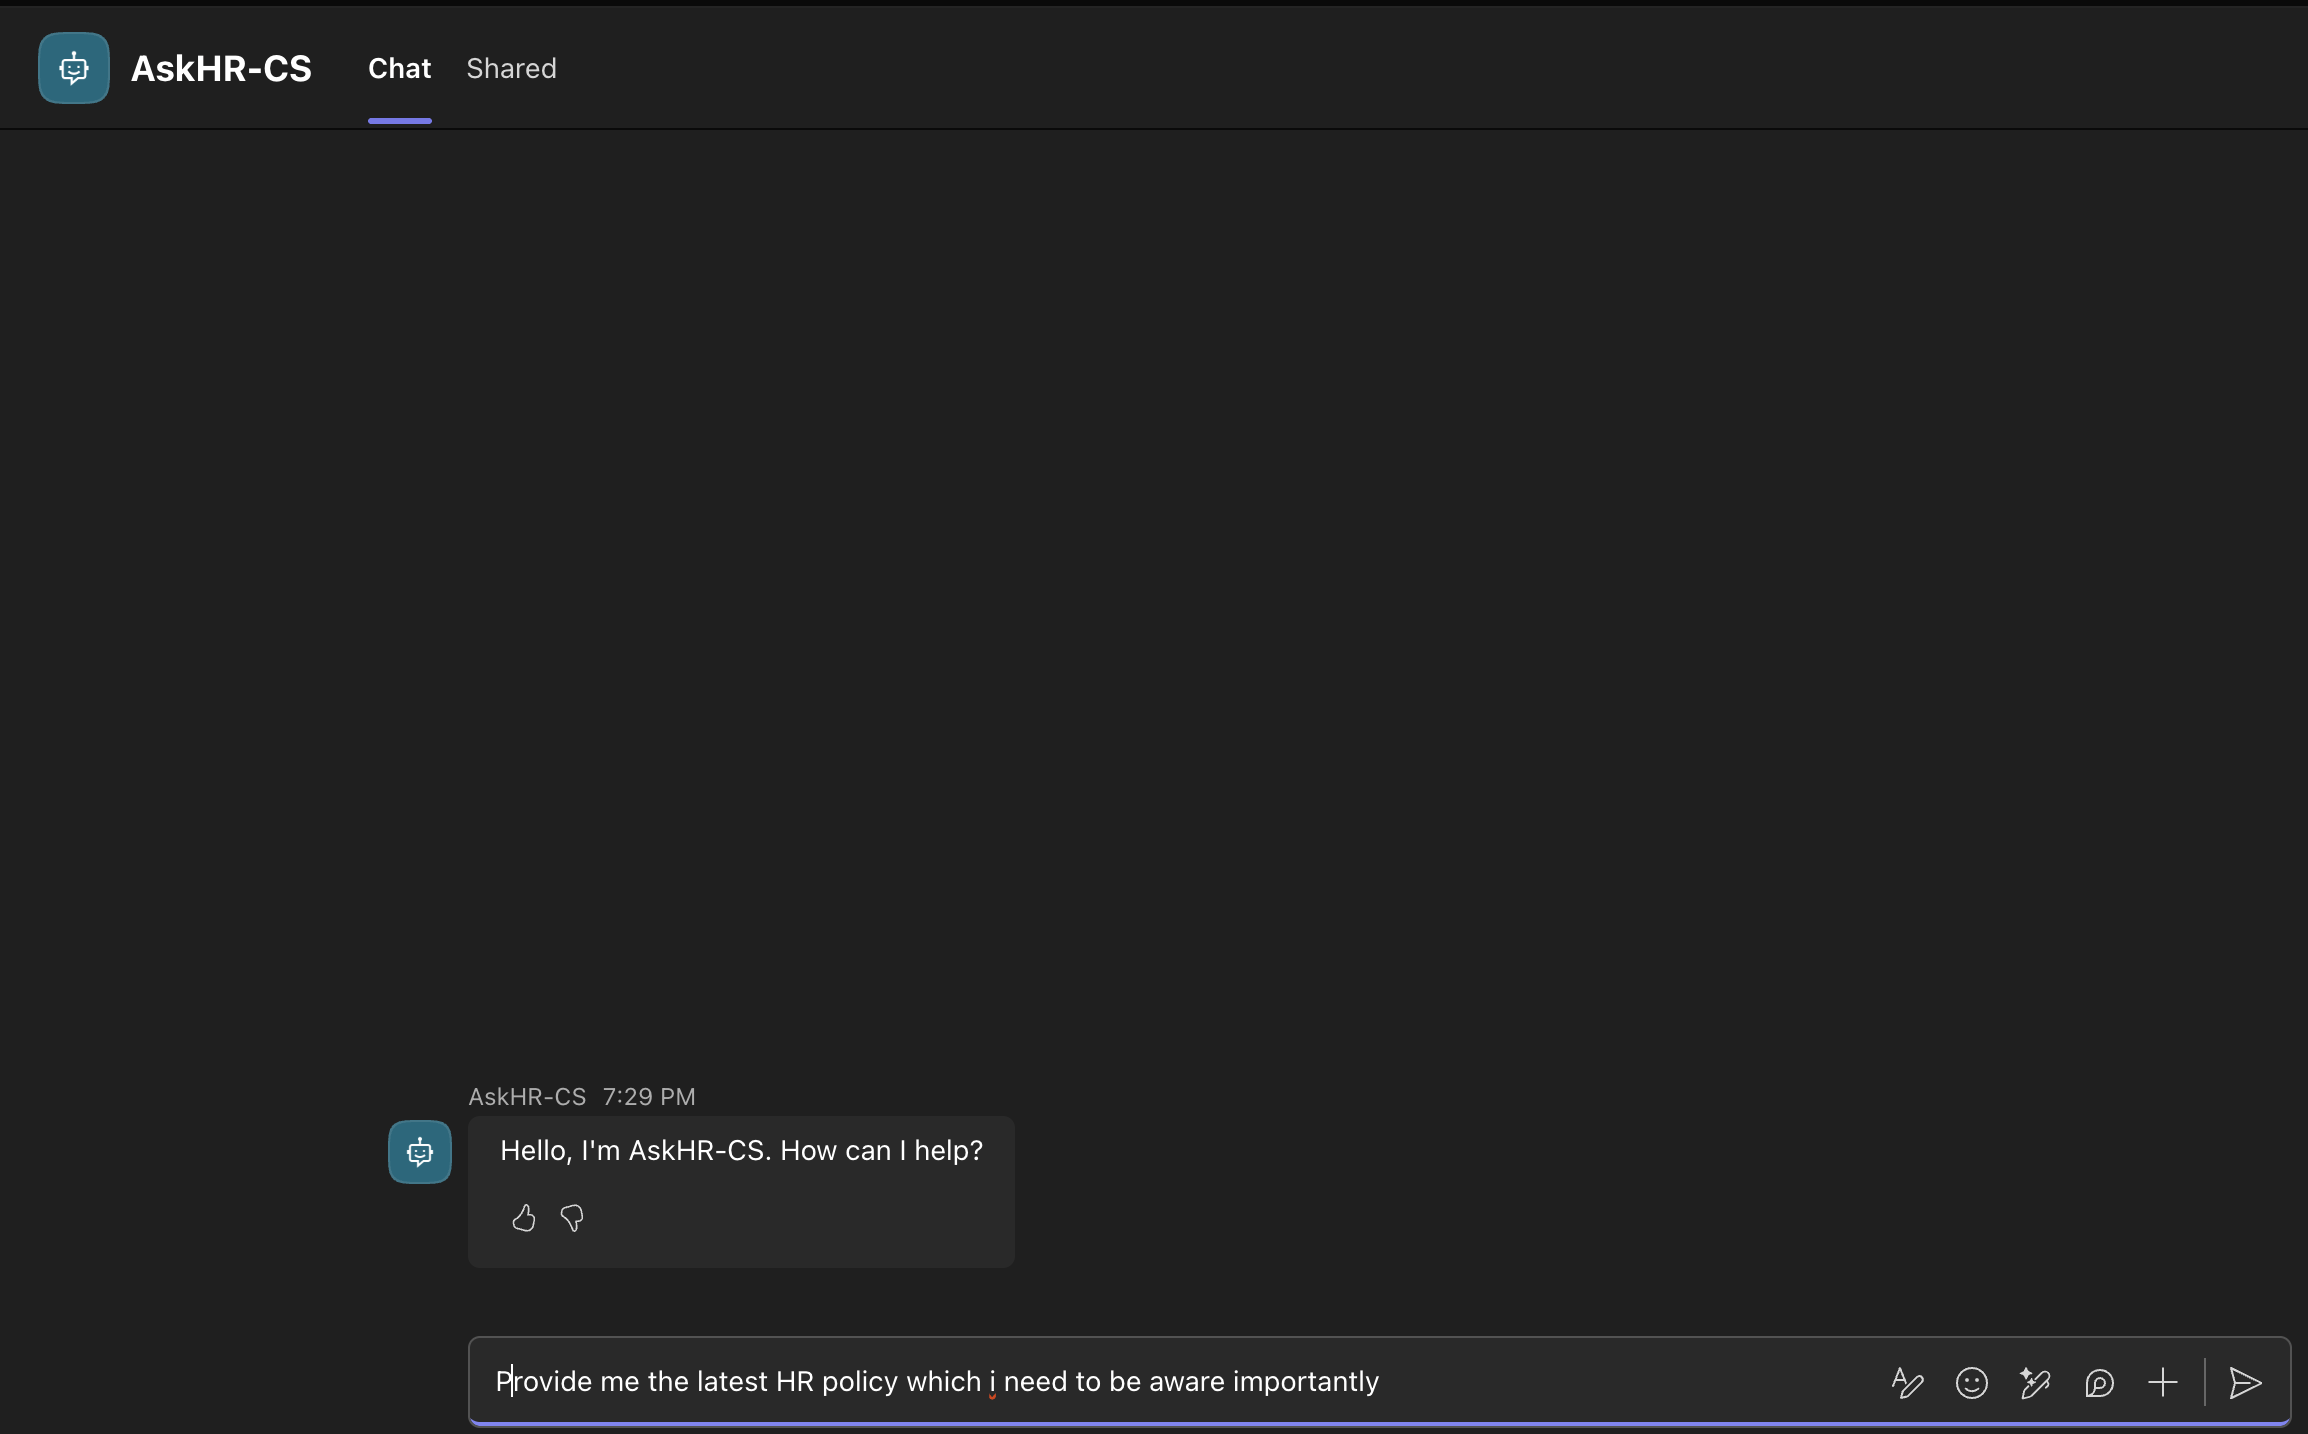
Fig 16: Entering a question to the agent directly in the Teams channel conversation.
The agent responds with an answer drawn from the connected SharePoint documents. Responses include citations — so users know exactly which document the answer came from and can click through to verify the source. This is the core value of the Copilot Studio agent SharePoint pattern.
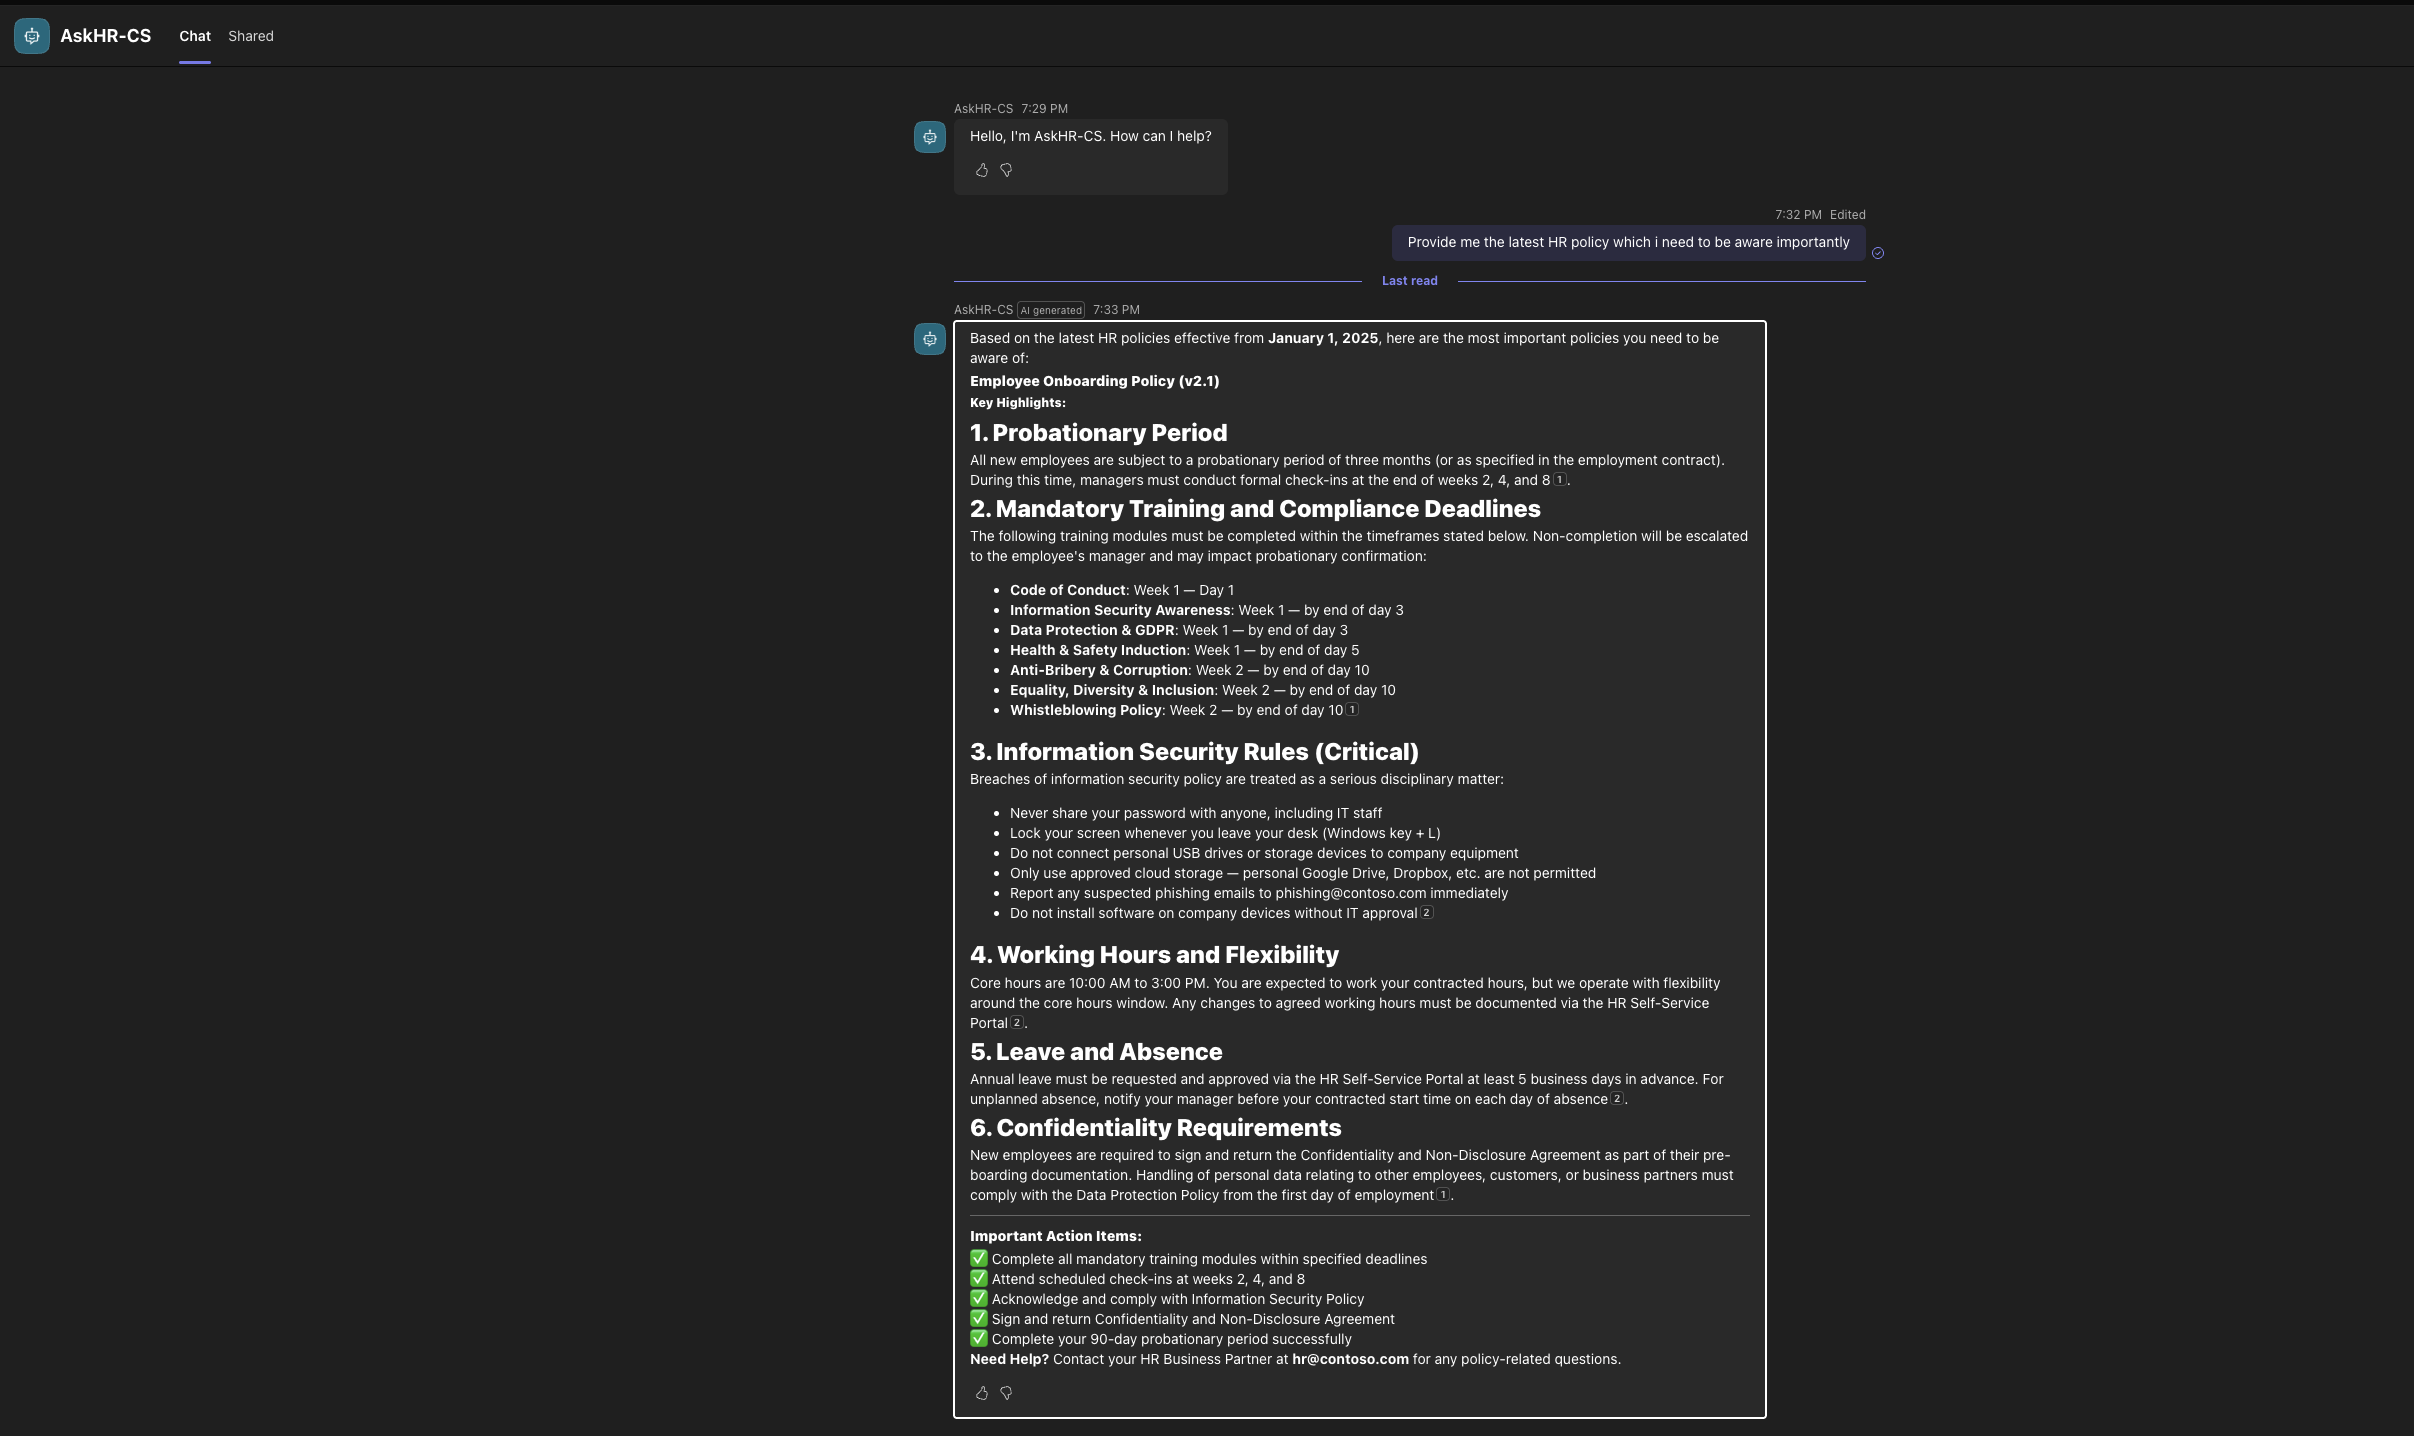
Fig 17: The agent’s response in Microsoft Teams — grounded in the connected SharePoint document library, with citations linking back to the source documents.
Quick Reference — Steps at a Glance
| # | Step | Where |
|---|---|---|
| 1 | Navigate to Copilot Studio and create a blank agent | copilotstudio.microsoft.com |
| 2 | Name the agent and click Create | Copilot Studio |
| 3 | Enter agent name and description | Overview tab |
| 4 | Click Add knowledge | Overview tab → Knowledge section |
| 5 | Select SharePoint and browse for the library | Knowledge source picker |
| 6 | Confirm selection → Add source → Add to agent | SharePoint browser |
| 7 | Navigate to Channels tab and add Microsoft Teams | Channels tab |
| 8 | Enable Force newest version and Publish | Channels tab |
| 9 | Copy link or download zip for Teams deployment | Channels → Availability options |
| 10 | Paste agent link into a Teams channel | Microsoft Teams |
| 11 | Click Add to install the agent in the channel | Microsoft Teams |
| 12 | Click Open to launch the agent | Microsoft Teams |
| 13 | Pin the agent for quick future access | Microsoft Teams |
| 14 | Enter a prompt to query the agent | Microsoft Teams |
| 15 | Agent responds with grounded, cited answers | Microsoft Teams |
Troubleshooting Your Copilot Studio Agent SharePoint Setup
| Issue | Resolution |
|---|---|
| SharePoint source from OneDrive/SharePoint section fails on document library | Use the dedicated SharePoint option in the source picker — this is a known bug in Copilot Studio |
| Add agent prompt does not appear after pasting Teams link | Wait a few seconds after pasting — Teams processes the link before surfacing the prompt |
| Agent does not appear in Teams app catalogue | Use the zip deployment method and submit through the Teams admin centre for IT approval |
| Agent responses are generic and not from SharePoint documents | Verify the knowledge source is confirmed and the agent has been republished after adding it |
| Users cannot access the agent in Teams | Confirm the Teams channel has been added in Copilot Studio and the agent is published |
What You Have Built
In under 15 minutes you now have a Copilot Studio agent SharePoint integration that:
- Is grounded in your SharePoint document library
- Is available in a Microsoft Teams channel for your entire team
- Returns cited, document-backed answers — not generic AI responses
- Can be pinned, shared, or deployed org-wide via the Teams admin centre
- Is fully configurable in Copilot Studio — add more sources, topics, or integrations at any time
Related Reading on wrvishnu.com
If you found this Copilot Studio agent SharePoint guide useful, explore more related content: