⚡ TL;DR
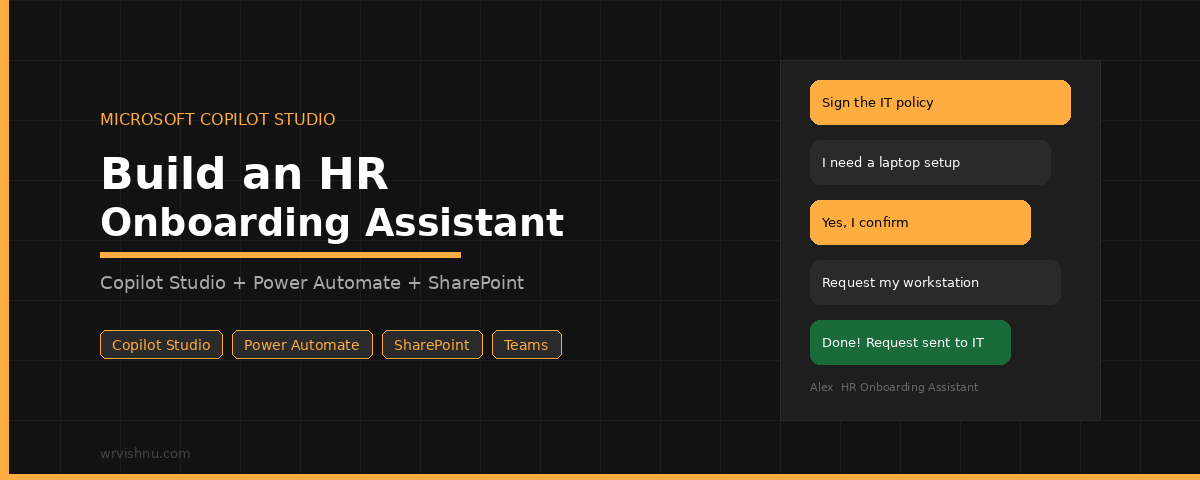
Build Alex, a Copilot Studio HR onboarding agent that handles two workflows new employees typically chase via email:
1. IT Policy Sign-off
Shows a policy summary in chat, captures confirmation via button choice, logs it to SharePoint with a timestamp, and emails the compliance team.
2. Workstation Setup Request
Asks 4 questions (OS, monitors, peripherals, notes), creates a SharePoint record, emails IT, looks up the employee’s manager in Entra ID, and posts a Teams notification if one is found.
What you build:
- 1 Copilot Studio agent with 2 topics
- 2 Power Automate flows triggered from the agent
- 2 SharePoint lists for records
- Connectors: SharePoint, Outlook, Office 365 Users, Teams
💡 Key detail: The agent pulls the signed-in user’s name and email automatically via System.User.DisplayName and System.User.Email — no manual input needed from the employee.
📦 Skip the build? Download the ready-made solution package from GitHub and just update the site URLs, email addresses, and Teams channel.
A Copilot Studio HR onboarding assistant is one of the most practical things you can build on Microsoft Power Platform. New employee onboarding is full of small repetitive tasks: policy acknowledgements, workstation setup requests, IT notifications. In practice, these create a trail of emails that HR and IT have to chase every single time they onboard someone new.
This guide walks through how to build Alex, a Copilot Studio HR onboarding assistant, completely from scratch. Specifically, it is a practical Microsoft Copilot Studio agent tutorial that covers the complete build step by step. You will create the agent, configure every topic node, build both Power Automate flows action by action, and wire everything together.
Every Send a message node, Ask a question node, Condition, and Call an action step is covered so you can follow along without gaps.
If you prefer to start from a working package, the complete solution download is linked at the end of this post. Working through the build steps first is still worth the time. You will understand every configuration decision in this Copilot Studio HR onboarding assistant, which makes customising it for your own organisation much easier.
This post is part of the Copilot Studio series on this site. For Power Automate flow patterns that complement this solution, the Power Platform category covers those in depth.
📌 New to Copilot Studio?
This guide assumes you are comfortable navigating the Copilot Studio canvas and understand what topics and actions are. If you are just starting out, these posts cover the essentials before you dive in:
- Copilot Studio Beginners Guide — start here if you have never opened Copilot Studio before.
- How to Build a Microsoft Copilot Studio Agent — covers creating your first agent from scratch.
- Copilot Studio Topics — explains how topics, trigger phrases, nodes, and branching work.
- Copilot Studio Knowledge Sources — covers how to connect knowledge bases to your agent.
What This Copilot Studio HR Onboarding Assistant Automates
The Copilot Studio HR onboarding assistant handles two workflows that normally involve a lot of back-and-forth between HR, IT, and new starters. In fact, HR onboarding is one of the most common copilot agent use cases for Power Platform makers because the process is repetitive, structured, and easy to automate.
The first is IT Security Policy sign-off. Instead of emailing a PDF and waiting for a reply, Alex shows the employee a plain-language policy summary in chat. When they confirm, a Power Automate flow records the acknowledgement in SharePoint with a timestamp and sends a compliance notification.
If the employee is not ready, Alex tells them to review the full policy and return later. Nothing is recorded until they actively confirm.
The second is workstation setup. In this topic, Alex asks four questions about operating system, monitors, peripherals, and extra requirements. A Power Automate flow takes those answers, creates a SharePoint record, emails IT, looks up the employee’s manager from Microsoft Entra ID, and posts a Teams notification when a manager is found.
The solution components are:
- Copilot Studio agent: Alex — HR Onboarding Assistant
- Topic 1: Sign the IT Policy
- Topic 2: Request My Workstation Setup
- Power Automate flow 1: HR — Record Policy Sign-off
- Power Automate flow 2: Submit Workstation Request
- SharePoint lists: Policy Sign-offs and Workstation Requests
- Connectors: SharePoint, Office 365 Outlook, Office 365 Users, Microsoft Teams
Prerequisites
Before you start, confirm the following are in place:
- A Microsoft Power Platform environment with Copilot Studio and Power Automate access.
- A SharePoint site for HR onboarding records. An existing HR Hub site works well.
- Permission to create SharePoint lists and columns.
- Permission to create connections for SharePoint, Office 365 Outlook, Office 365 Users, and Microsoft Teams.
- A Microsoft Teams team and channel for IT or onboarding notifications.
- At least one test user account with a manager assigned in Microsoft Entra ID.
Step 1: Create the SharePoint Lists
Both Power Automate flows write to a dedicated SharePoint list. Therefore, create these before building the flows so the list and column names are ready when you configure the flow actions.
List 1: Policy Sign-offs
Create a list named Policy Sign-offs in your HR SharePoint site and add these columns:
| Column name | Type | Purpose |
|---|---|---|
| Title | Single line of text | Employee full name |
| EmployeeEmail | Single line of text | Employee email address |
| PolicyName | Single line of text | Policy name and version, e.g. IT Security Policy v2.1 |
| SignedOn | Date and time | Timestamp written by the flow |
| Confirmed | Yes/No | Set to true when the employee confirms |
List 2: Workstation Requests
Create a second list named Workstation Requests and add these columns:
| Column name | Type | Purpose |
|---|---|---|
| Title | Single line of text | Employee full name |
| EmployeeEmail | Single line of text | Employee email address |
| OperatingSystem | Choice | Windows 11 or macOS |
| MonitorSetup | Choice | Single Monitor or Dual Monitor |
| PeripheralsNeeded | Multiple lines of text | Free-text peripheral request |
| AdditionalNotes | Multiple lines of text | Extra notes for IT |
| RequestStatus | Choice | New, In Progress, Completed, or Cancelled |
| SubmittedOn | Date and time | Timestamp written by the flow |
Step 2: Create the Copilot Studio Agent
Open Microsoft Copilot Studio and confirm you are in the correct Power Platform environment. The Copilot Studio HR onboarding assistant is created here as a new agent.
Select Create from the left navigation and then choose New agent. You will land on the agent creation wizard.
Skip the description prompts. Click Skip to configure to go straight to the settings form. Enter these values:
- Name: Alex — HR Onboarding Assistant
- Description: Helps new employees complete IT policy sign-off and workstation setup requests during onboarding.
- Instructions: Leave blank for now. You will add these in Step 3.
- Language: English
Select Create. The agent canvas opens and your Copilot Studio HR onboarding assistant shell is ready to configure.
Before doing anything else, open Settings from the top right. Go to the Generative AI tab and confirm these options are turned on: Generative actions, Generative AI recogniser, and File analysis. Select Save and close Settings. These settings control how the copilot agent Studio topics handle natural language from employees.
Step 3: Write the Agent Instructions
On the agent canvas, select the Overview tab. Find the Instructions panel and select Edit.
This controls how the Copilot Studio HR onboarding assistant behaves across every conversation. It is the most important configuration step in the agent setup.
Enter the following text exactly:
You are Alex, an HR onboarding assistant for new employees.

Answer questions about onboarding, HR policies, benefits, office facilities, and IT setup using the knowledge base provided.

Guide employees through IT Security Policy acknowledgement when they ask.

Collect workstation setup preferences and submit them to IT using the connected workflow.

Keep answers friendly, clear, and concise. Most responses should be under four sentences.

Do not invent answers. If you do not know the answer to an HR question, refer the employee to hr@[YOUR-HR-EMAIL].

Do not discuss salary, performance ratings, disciplinary records, or legal matters.

Do not ask for the employee name or email address. Use the values from the signed-in user profile.
Replace hr@[YOUR-HR-EMAIL] with your organisation’s HR contact address. Select Save.
The last instruction matters. The Copilot Studio HR onboarding assistant pulls the signed-in user’s name and email using System.User.DisplayName and System.User.Email automatically. This means Alex never asks the employee to type their own details, which keeps the conversation short and the records accurate.
Step 4: Build the Sign the IT Policy Topic
The Sign the IT Policy topic is the core policy acknowledgement conversation in this Copilot Studio HR onboarding assistant. Every node and branch is covered below.
Select Add a topic and choose From blank. The topic canvas opens with a single Trigger node already on screen.
At the top of the canvas, select the topic name field and type: Sign the IT Policy.
Trigger node: add trigger phrases
Select the Trigger node on the canvas. A panel opens on the right. In the Phrases section, add each of these trigger phrases one at a time by typing the phrase and pressing Enter:
- sign the IT policy
- I need to acknowledge the policy
- policy sign-off
- IT security acknowledgement
- acknowledge IT policy
You do not need exact matches. The generative AI recogniser handles natural variations, so the employee can type “I want to sign the security policy” and the topic will still activate.
Send a message node: show the policy summary
Select the + button below the Trigger node. Choose Send a message. Enter the following policy summary text in the message field:
Before I record your acknowledgement, here is a quick summary of the IT Security Policy:

1. Use only approved devices on the corporate network.
2. Never share your login credentials with anyone.
3. Report suspicious emails or unexpected access requests to IT immediately.
4. Keep sensitive files inside approved company systems only.
5. Lock your screen whenever you step away from your desk.

Have you read and understood the IT Security Policy?
Ask a question node: get the employee’s confirmation
Select the + below the Send a message node. Choose Ask a question. In the question configuration panel on the right, fill in these fields:
- Enter a message: Have you read and understood the IT Security Policy?
- Identify: Select Multiple choice options from the dropdown.
- Options for user: Select + New option and add two choices: Yes, I confirm and Not yet, I need more time.
- Save response as: Select Create new variable. Name the variable PolicyConfirmation.
Once you save this node, Copilot Studio automatically creates two branches on the canvas, one for each choice. You will see a condition fork labelled with each option.
Yes, I confirm branch: call the flow and confirm
In the Yes, I confirm branch, select the + button. Choose Call an action. A panel opens showing available flows. If you have not built the flow yet, select Create a flow. This opens Power Automate in a new tab with the Copilot trigger pre-configured. Build the flow using the steps in Step 6 of this guide, then come back and select the flow here.
Once the HR — Record Policy Sign-off flow appears in the list, select it. The input mapping panel opens. Map each input as follows:
- EmployeeName: Select the variable picker icon. Choose System and then select User.DisplayName.
- EmployeeEmail: Select the variable picker. Choose System and then select User.Email.
- PolicyName: Select the input field and type the static value:
IT Security Policy v2.1
Select Save on the Call an action node. Select the + below. Choose Send a message. Enter this confirmation text:
Thank you. Your acknowledgement of the IT Security Policy has been recorded and a confirmation has been sent to the compliance team. Welcome to the team!
Select the + below that message node. Choose End conversation. This cleanly closes the conversation once the sign-off is complete.
Not yet, I need more time branch: send guidance
In the Not yet, I need more time branch, select the +. Choose Send a message. Enter:
No problem. Take some time to review the full policy on the HR Hub when you are ready. Come back to this chat and type "sign the IT policy" to complete your acknowledgement. Your sign-off will not be recorded until you confirm.
Select the + below. Choose End conversation. Select Save at the top of the topic canvas.
Step 5: Build the Request My Workstation Setup Topic
The Request My Workstation Setup topic is the second conversation flow in this Copilot Studio HR onboarding assistant. It collects four answers and passes them to the Submit Workstation Request flow.
Select Topics from the left navigation. Select Add a topic and choose From blank. Name the topic Request My Workstation Setup.
Trigger node: add trigger phrases
Select the Trigger node. Add these phrases:
- request my workstation
- I need a laptop
- workstation setup
- hardware request
- set up my computer
- I need IT equipment
Send a message node: opening message
Select + below the Trigger node. Choose Send a message. Enter:
I will collect your workstation preferences and send them to the IT team. This takes about a minute. Let's get started.
Ask a question node 1: operating system
Select + below the opening message. Choose Ask a question. Configure as follows:
- Enter a message: Which operating system do you prefer for your workstation?
- Identify: Multiple choice options
- Options for user: Add two options: Windows 11 and macOS
- Save response as: Create new variable. Name it OSChoice.
Multiple choice questions do not create branches by default unless you configure conditions. For this topic, you want to collect all four answers before acting, so continue adding the next question below this one on the main path.
Ask a question node 2: monitor setup
Select + below the OS question node. Choose Ask a question. Configure:
- Enter a message: How many monitors do you need at your workstation?
- Identify: Multiple choice options
- Options for user: Single Monitor and Dual Monitor
- Save response as: Create new variable. Name it MonitorSetup.
Ask a question node 3: peripherals
Select + below the monitor question. Choose Ask a question. Configure:
- Enter a message: Do you need any specific peripherals, such as an ergonomic keyboard, wireless mouse, or headset? If not, type none.
- Identify: Change the dropdown from Multiple choice to User’s entire response. This allows free text input.
- Save response as: Create new variable. Name it Peripherals.
Ask a question node 4: additional notes
Select + below the peripherals question. Choose Ask a question. Configure:
- Enter a message: Is there anything else IT should know, such as a standing desk, docking station, or accessibility requirement? If not, type none.
- Identify: User’s entire response
- Save response as: Create new variable. Name it AdditionalNotes.
Call an action node: submit the request flow
Select + below the fourth question. Choose Call an action. Select the Submit Workstation Request flow from the list. If you have not built it yet, select Create a flow and follow Step 7, then come back to map the inputs here.
Map each input as follows:
- EmployeeName: Variable picker → System → User.DisplayName
- EmployeeEmail: Variable picker → System → User.Email
- OSChoice: Variable picker → select the OSChoice variable from question 1
- MonitorSetup: Variable picker → select the MonitorSetup variable
- Peripherals: Variable picker → select the Peripherals variable
- AdditionalNotes: Variable picker → select the AdditionalNotes variable
Send a message node: confirmation
Select + below the Call an action node. Choose Send a message. Enter:
Your workstation request has been submitted to the IT team. They will review it and be in touch before your start date. If you have urgent requirements, contact IT directly.
Select + below the confirmation message. Choose End conversation. Select Save at the top of the topic canvas.
Step 6: Build the Policy Sign-off Flow in Power Automate
Open Power Automate. Select Create from the left navigation, then select Instant cloud flow.
This is the first Power Automate flow that the Copilot Studio HR onboarding assistant calls when an employee confirms the IT policy. It records the sign-off in SharePoint and notifies the compliance team.
Name the flow HR — Record Policy Sign-off. Do not select a trigger from the list. Select Skip. You will add the Copilot trigger manually.
In the flow canvas, select Add a trigger. Search for Copilot. Select When Copilot Studio calls a flow. This trigger is also labelled as the Power Virtual Agents trigger in some environments. Both are the same trigger.
Add flow inputs to the trigger
Select the trigger card on the canvas to expand it. Select Add an input. Add three text inputs one at a time:
- Input 1: Select Text. Name it EmployeeName. Description: Employee full name.
- Input 2: Select Add an input again. Choose Text. Name it EmployeeEmail. Description: Employee email address.
- Input 3: Select Add an input. Choose Text. Name it PolicyName. Description: Name and version of the policy confirmed.
Action 1: Create a SharePoint item
Select + below the trigger. Select Add an action. Search for SharePoint and select Create item. Configure the action:
- Site Address: Select or type your HR Hub SharePoint site URL.
- List Name: Select Policy Sign-offs from the dropdown.
- Title: Open dynamic content and select EmployeeName.
- EmployeeEmail: Open dynamic content. Select EmployeeEmail.
- PolicyName: Open dynamic content. Select PolicyName.
- SignedOn: Select Expression (not dynamic content). Type
utcNow()and select OK. - Confirmed: Select Yes from the dropdown.
Action 2: Send an email notification
Select + below the SharePoint action. Search for Office 365 Outlook and select Send an email (V2). Configure the action:
- To: Enter your HR compliance or IT mailbox, for example
itcompliance@[YOUR-DOMAIN]. - Subject: Type: IT Policy Sign-off Confirmed — then add dynamic content EmployeeName.
- Body: Build using dynamic content values:
A new IT Security Policy sign-off has been recorded.

Employee name: [EmployeeName]
Employee email: [EmployeeEmail]
Policy confirmed: [PolicyName]
Signed on: [utcNow() expression]

This acknowledgement was recorded automatically via the HR onboarding assistant.
Action 3: Respond to Copilot Studio
Select + below the email action. Search for Respond to Copilot and select Respond to Copilot Studio or a Power Virtual Agents bot. No additional configuration is needed. This action sends a success signal back to the agent so the topic knows the flow completed and can show the confirmation message to the employee. Select Save at the top of the flow.
Step 7: Build the Workstation Request Flow in Power Automate
Create a second instant cloud flow. Name it Submit Workstation Request. Add the same trigger: When Copilot Studio calls a flow.
This is the second Power Automate flow in the Copilot Studio HR onboarding assistant and handles the complete workstation setup submission end to end.
Add flow inputs to the trigger
Select the trigger card and add six text inputs:
- EmployeeName — Employee full name
- EmployeeEmail — Employee email address
- OSChoice — Selected operating system
- MonitorSetup — Selected monitor configuration
- Peripherals — Requested peripherals
- AdditionalNotes — Extra setup notes
Action 1: Create a SharePoint item
Select + below the trigger. Add a SharePoint Create item action against the Workstation Requests list:
- Site Address: Your HR Hub SharePoint site
- List Name: Workstation Requests
- Title: Dynamic content → EmployeeName
- EmployeeEmail: Dynamic content → EmployeeEmail
- OperatingSystem: Dynamic content → OSChoice
- MonitorSetup: Dynamic content → MonitorSetup
- PeripheralsNeeded: Dynamic content → Peripherals
- AdditionalNotes: Dynamic content → AdditionalNotes
- RequestStatus: Type the static value
New - SubmittedOn: Expression →
utcNow()
Action 2: Send an email to IT
Select +. Add an Outlook Send an email (V2) action:
- To: Your IT service desk mailbox, for example
itsupport@[YOUR-DOMAIN] - Subject: New Workstation Request — then dynamic content EmployeeName
- Body: Build using all six input values:
A new workstation setup request has been submitted.

Employee: [EmployeeName]
Email: [EmployeeEmail]
Operating system: [OSChoice]
Monitor setup: [MonitorSetup]
Peripherals: [Peripherals]
Additional notes: [AdditionalNotes]

This request was submitted automatically via the HR onboarding assistant.
Action 3: Look up the employee’s manager
Select +. Search for Office 365 Users and select Get manager (V2). In the User (UPN) field, open dynamic content and select EmployeeEmail. The action returns the manager’s profile if one is assigned in Microsoft Entra ID.
Action 4: Condition — check if manager exists
Select +. Search for Condition and select it. Configure the condition to check whether the manager lookup returned an email address:
- Left value: Open dynamic content. Under Get manager (V2), select Mail.
- Operator: Change to is not equal to
- Right value: Leave completely empty.
This evaluates to True when the manager lookup returned a valid email, and False when no manager is assigned.
Yes branch: post a Teams notification
In the If yes branch, select Add an action. Search for Microsoft Teams and select Post a message in a chat or channel. Configure the Teams action:
- Post as: Flow bot
- Post in: Channel
- Team: Select your IT or onboarding Teams team from the dropdown.
- Channel: Select the appropriate notification channel.
- Message: Build using dynamic content:
New workstation request submitted.
Employee: [EmployeeName]
OS: [OSChoice]
Monitors: [MonitorSetup]
Peripherals: [Peripherals]
Notes: [AdditionalNotes]
Manager notified: [Mail from Get manager (V2)]
No branch: no action needed
Leave the If no branch empty. When a manager is not found, the flow skips the Teams notification and continues without failing.
Action 5: Respond to Copilot Studio
Select + below the Condition card at the merged level after both branches. Add a Respond to Copilot Studio or a Power Virtual Agents bot action. No additional configuration is needed. Select Save. Run a manual test before connecting the flow to the topic.
Step 8: Connect the Flows, Publish, and Test
With both flows built and saved, return to Copilot Studio. The Copilot Studio HR onboarding assistant is now ready to be wired up. Every Call an action node in both topics needs to be connected to the correct flow before you publish.
Connect the policy sign-off flow to Topic 1
Open the Sign the IT Policy topic. Find the Call an action node in the Yes, I confirm branch. If you created the flow from inside the topic earlier, it should already be connected. If not, select the node and choose HR — Record Policy Sign-off from the flow list.
Confirm the input mapping is correct:
- EmployeeName → System.User.DisplayName
- EmployeeEmail → System.User.Email
- PolicyName →
IT Security Policy v2.1(static text)
Connect the workstation request flow to Topic 2
Open the Request My Workstation Setup topic. Find the Call an action node. Select Submit Workstation Request from the flow list. Confirm the input mapping:
- EmployeeName → System.User.DisplayName
- EmployeeEmail → System.User.Email
- OSChoice → OSChoice variable
- MonitorSetup → MonitorSetup variable
- Peripherals → Peripherals variable
- AdditionalNotes → AdditionalNotes variable
Publish the agent
Select Publish from the top right of the Copilot Studio canvas. Confirm the publish action. Publishing makes the current Copilot Studio HR onboarding assistant configuration live for testing with real users or the test panel. Always publish after connecting the flows to the topics.
Test end to end
Use this checklist to validate every part of the Copilot Studio HR onboarding assistant solution:
- In the Copilot Studio test chat panel, type: sign the IT policy
- Confirm the Sign the IT Policy topic activates and the policy summary message appears.
- Select Yes, I confirm.
- Confirm the flow runs and a new item appears in the Policy Sign-offs SharePoint list.
- Confirm the notification email arrives at the compliance mailbox.
- Type: request my workstation
- Confirm the Request My Workstation Setup topic activates and the opening message appears.
- Answer all four questions with test values.
- Confirm a new item appears in the Workstation Requests list with RequestStatus set to New.
- Confirm the IT email arrives with all six values populated.
- If the test account has a manager assigned in Microsoft Entra ID, confirm the Teams channel notification posts.
- Test with an account that has no manager. Confirm the flow completes without error and the Teams post is skipped.
- Run a final test using a real signed-in Microsoft 365 account to confirm System.User.DisplayName and System.User.Email return real values.
Download the Complete Solution from GitHub
If you prefer to start from the finished package, download the AlexHelpDesk solution from GitHub. It includes the complete Copilot Studio HR onboarding assistant with both Power Automate flows, connection references, and all solution metadata needed to get started quickly.
GitHub: Download the AlexHelpDesk solution package
After importing, update the SharePoint site URL, list names, email recipients, and Teams team and channel in both flows. The repository documentation covers each of those changes.
The demo below shows the complete employee experience for both topics. Alex guides a new employee through the IT Security Policy acknowledgement, collects workstation preferences, and triggers the Power Automate flows that notify IT and the employee’s manager automatically.
Wrapping Up: What You Built With This Copilot Studio HR Onboarding Assistant
Building a Copilot Studio HR onboarding assistant end to end gives you a clear picture of how topics, flows, SharePoint, and Teams connect together as a complete solution. The employee gets a self-service conversation that takes two minutes. HR gets a timestamped acknowledgement. IT gets a structured workstation request with every detail they need before day one. The manager gets a Teams notification without anyone having to send it manually.
The core pattern transfers to other processes. Once you are comfortable connecting a Copilot Studio topic to a Power Automate flow, the same approach works for leave requests, access provisioning, equipment returns, and many other repetitive workflows. The Copilot Studio HR onboarding assistant pattern scales to almost any structured employee request.
Coming Soon: FAQ Agent with Live Escalation to a Human Agent
The next guide in this series covers building an FAQ Copilot Studio agent with intelligent escalation. When the agent cannot answer a question or the employee requests it, the conversation hands off automatically to a live HR or IT team member inside Microsoft Teams — with full conversation history carried over so the agent does not have to repeat themselves.
The solution will cover topic fallback handling, escalation trigger conditions, Teams handoff configuration, and how to route to the right team based on the conversation context.
📌 Save This Page
Bookmark this post or subscribe below to be notified when the FAQ agent with escalation guide goes live. The solution package will be linked here when published.
For more guides on Copilot Studio agent development and Power Automate flow building, explore the related categories on this site.